How to Add Video Conferencing to WordPress with the Plug-N-Meet Plugin
Welcome to the definitive guide for integrating plugNmeet, the powerful, open-source video conferencing solution, into your WordPress website. This document provides a complete walkthrough, from installation to leveraging advanced features, enabling you to host secure, feature-rich video meetings directly from your own domain. With plugNmeet, you can create a seamless virtual meeting experience that feels like a native part of your site.
1. Key Features of the WordPress Integration
The plugNmeet plugin is more than just a way to embed a video call; it's a deep integration that brings powerful management tools directly into your WordPress dashboard.
- Seamless Shortcode Integration: Embed a full-featured video conference room into any page or post with a simple WordPress shortcode.
- Backend Management: Create rooms, manage recordings, view analytics, and access meeting artifacts without ever leaving your WordPress admin area.
- Advanced Post-Session Analytics: Go beyond simple attendance. Get detailed reports on participant engagement, talk time, and connection quality, all exportable to Excel.
- Full Asset Control: Easily access, download, and manage all room assets, including recordings, speech transcripts, and AI-generated meeting summaries.
- Role-Based Permissions: Use standard WordPress user roles to control who can join meetings as a moderator and who can manage recordings.
- Developer Friendly: Extend the plugin's functionality by hooking into webhook events to process real-time meeting data.
2. Installation & Initial Setup
This section covers installing the plugin and connecting it to your PlugNmeet server.
Step 2.1: Install and Activate the Plugin
- From your WordPress dashboard, navigate to Plugins > Add New.
- In the search bar, type plugnmeet.
- Find the official Plug-N-Meet plugin and click Install Now, then Activate.
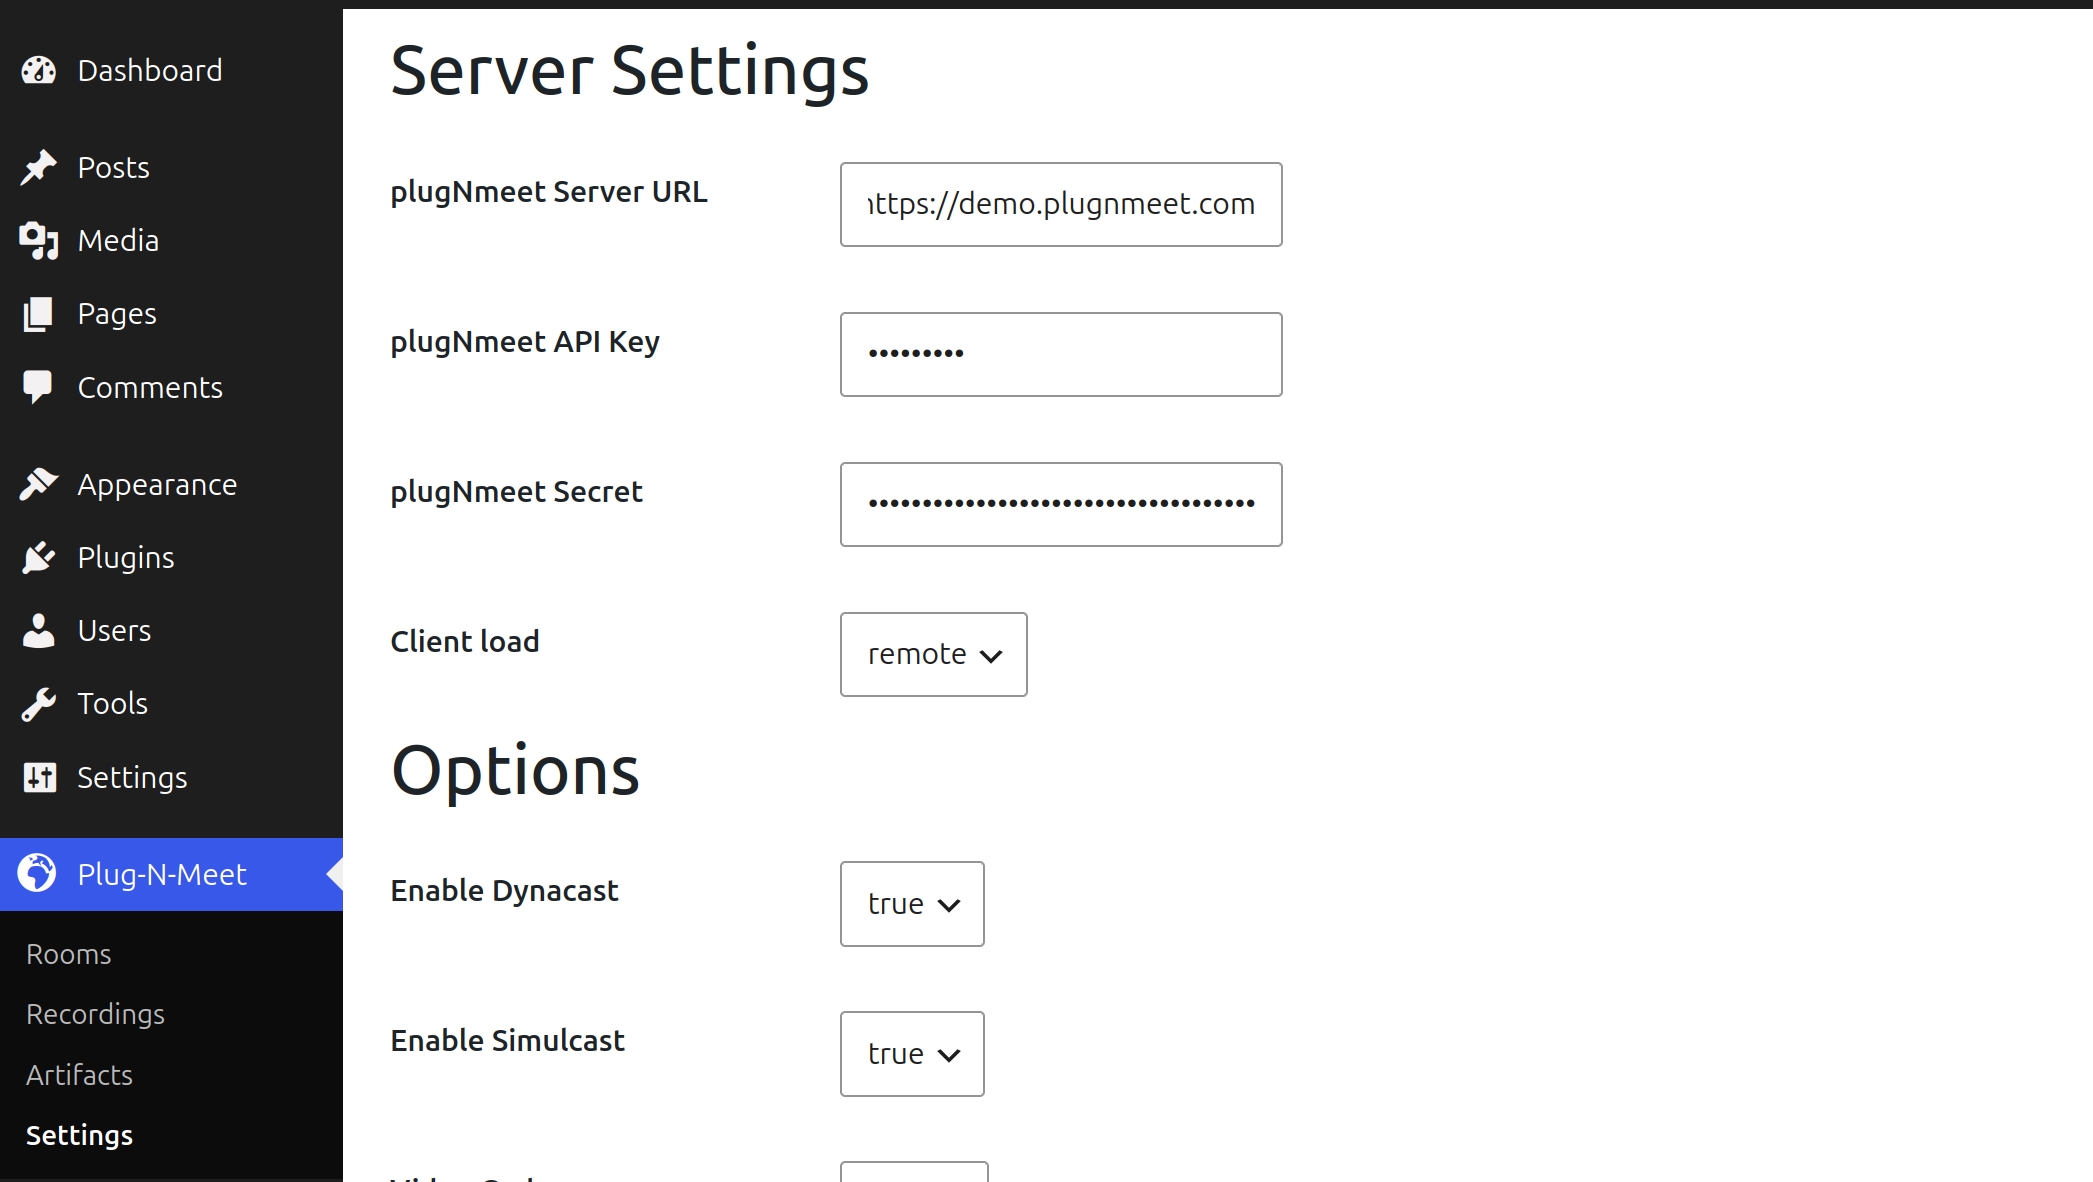
Step 2.2: Connect to Your Server (API Settings)
This is the most important step. The plugin requires a connection to a working PlugNmeet server.
- From your WordPress dashboard, navigate to the new Plug-N-Meet menu item and select Settings.
- Fill in the three fields: Server URL, API Key, and API Secret with the credentials from your self-hosted or PlugNmeet Cloud server.
- You must replace the default demo credentials for the plugin to work.
Note: The plugin includes pre-configured demo credentials to help you test its features immediately. This demo server is a shared resource and is not intended for production use as it can be unreliable. For any important meetings, we strongly recommend using your own server to ensure a stable and professional experience for you and your users.
Client Load Method
In the settings, you will also find the Client Load option. This important setting changes how the video meeting is displayed to your users and how you can customize its appearance.
-
Remote (Recommended for most users): This option loads the video conferencing interface directly from your main plugNmeet server and embeds it seamlessly into your WordPress page. It is the simplest method and always uses the most up-to-date software.
- Customization: You can easily customize the branding (logos, colors, etc.) for each room using the Design Customization tab when creating or editing a room.
-
Redirect: This option sends the user to a separate browser tab to join the meeting directly on your plugNmeet server. It is simple and keeps the meeting interface separate from your website's layout.
- Customization: Branding is controlled by the default configuration on your plugNmeet server. Any changes made in the "Design Customization" tab within WordPress will not apply with this method.
-
Local (Advanced, for developers): This option is for users who need to make deep, structural changes to the meeting interface. It requires you to download the client application files, modify the source code, and host them on your own server. This provides maximum control but requires web development experience and manual updates.
After saving your settings for the first time, you must refresh your WordPress permalinks. This ensures that the direct links to your meeting rooms (e.g., yoursite.com/plugnmeet/room/your-room-id) will work correctly and not result in a "404 Not Found" error.
- Go to Settings > Permalinks in your WordPress dashboard.
- You do not need to change any settings. Simply click the "Save Changes" button.
You must repeat this step anytime you change the Room Slug Path in the Plug-N-Meet settings.
3. Creating & Publishing Your First Meeting
Step 3.1: Navigating to the Room Creation Page
To create a new meeting room, navigate to Plug-N-Meet > Rooms from your WordPress dashboard and click the "Add New" button. This will take you to the detailed room configuration page, which is organized into several tabs.
Step 3.2: Detailed Room Configuration
This form gives you granular control over every aspect of the session.
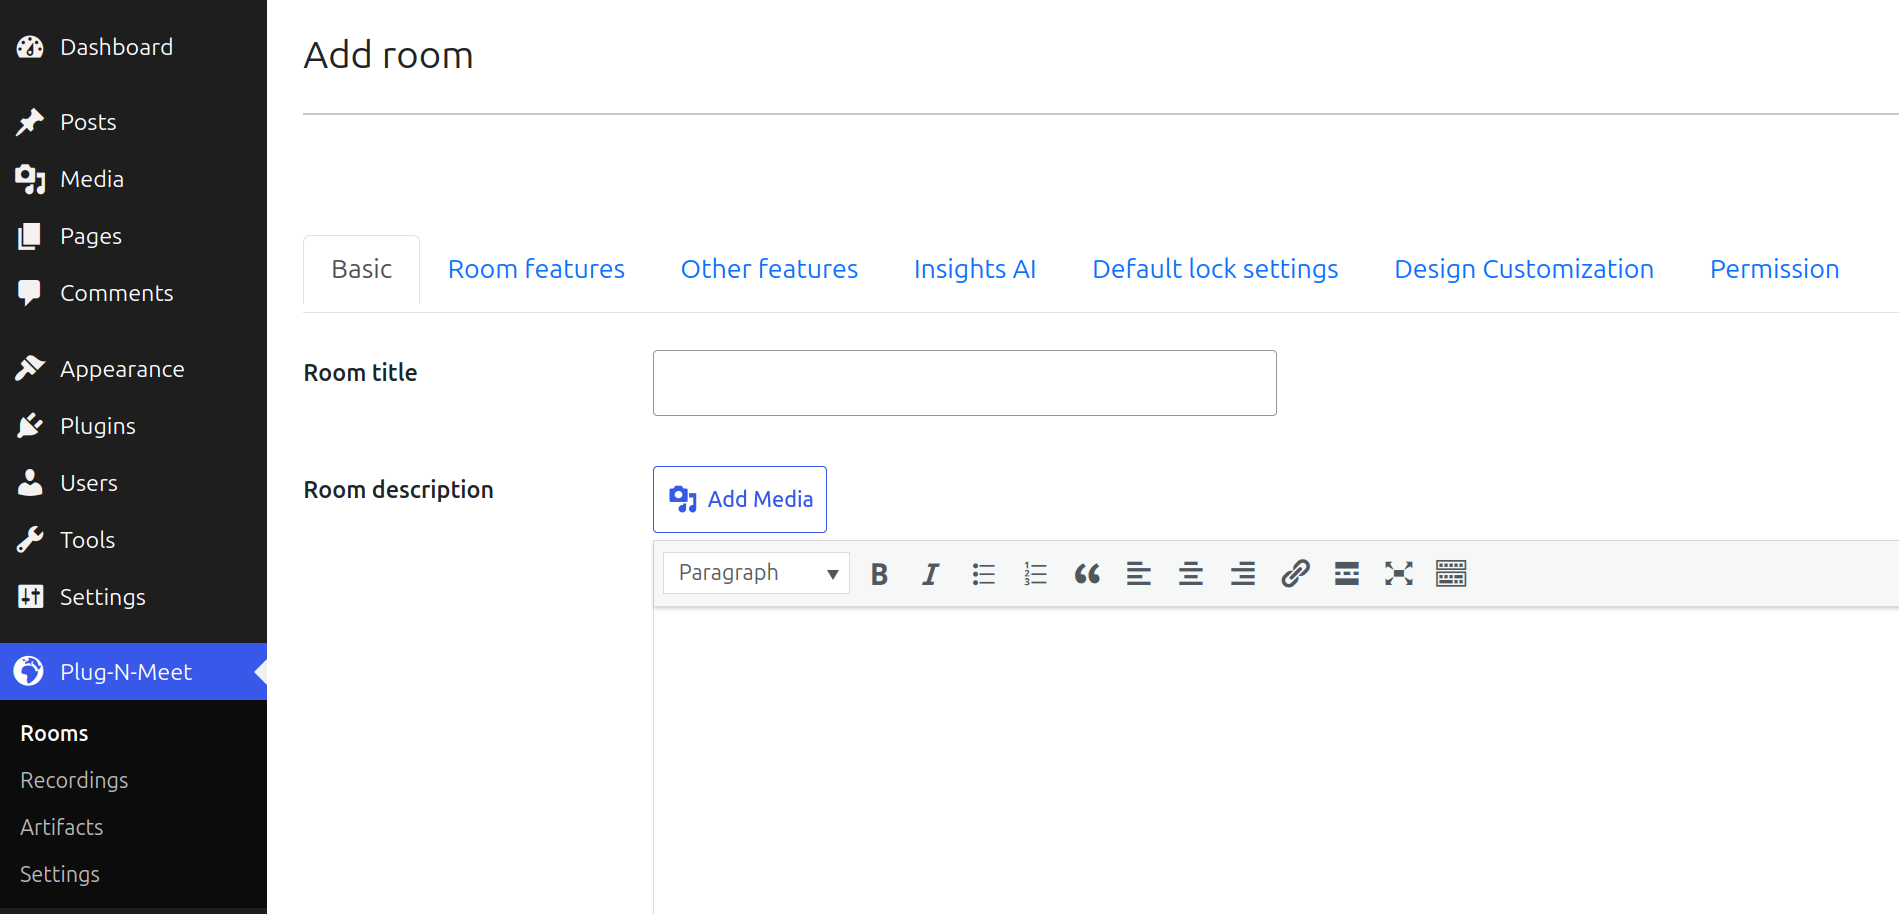
Basic
This tab covers the essential information for your room.
- Title & Description: Give your meeting room a clear title and an optional description.
- Passwords: Set separate passwords for moderators and attendees.
- Welcome Message: Customize the initial message that appears in the chat when users join.
- Max Participants: Set a limit on the number of users who can join (use
0for unlimited).
Room Features
This section allows you to enable or disable the core interactive features of the meeting room, such as webcams, screen sharing, and chat.
Other Features
This tab provides a wide range of settings to control specific functionalities within the room:
- Recording: Enable or disable cloud recording.
- External Broadcasting: Configure options for streaming your meeting to external platforms.
- Chat, Shared Notepad, Whiteboard: Toggle these collaborative tools on or off.
- External Media Player: Allow moderators to play media from external sources.
- Waiting Room: Enable a waiting room to screen participants before they join.
- Breakout Rooms: Allow moderators to split participants into smaller groups.
- Display External Link: Configure a custom link to be displayed to participants.
- Ingress: Set up options for bringing external media streams into the meeting.
- Polls: Enable the polling feature for interactive feedback.
- SIP Dial-in: Configure options for users to join via a SIP phone call.
- End-to-End Encryption: Enable E2EE for maximum security.
Insights AI
In this tab, you can enable or disable AI-powered features for the meeting, such as automatic transcription and meeting summaries.
Default Lock Settings
Configure the initial "locked" state for various features when a participant joins. For example, you can start the meeting with microphones, webcams, or the whiteboard locked to maintain order. Moderators can unlock these features during the meeting.
Design Customization
This tab allows you to override the global design settings for this specific room. You can change the logo, background, and color scheme to match your brand or the topic of the meeting.
Permission
This powerful tab allows you to define exactly how different WordPress user roles interact with the meeting room and its recordings.
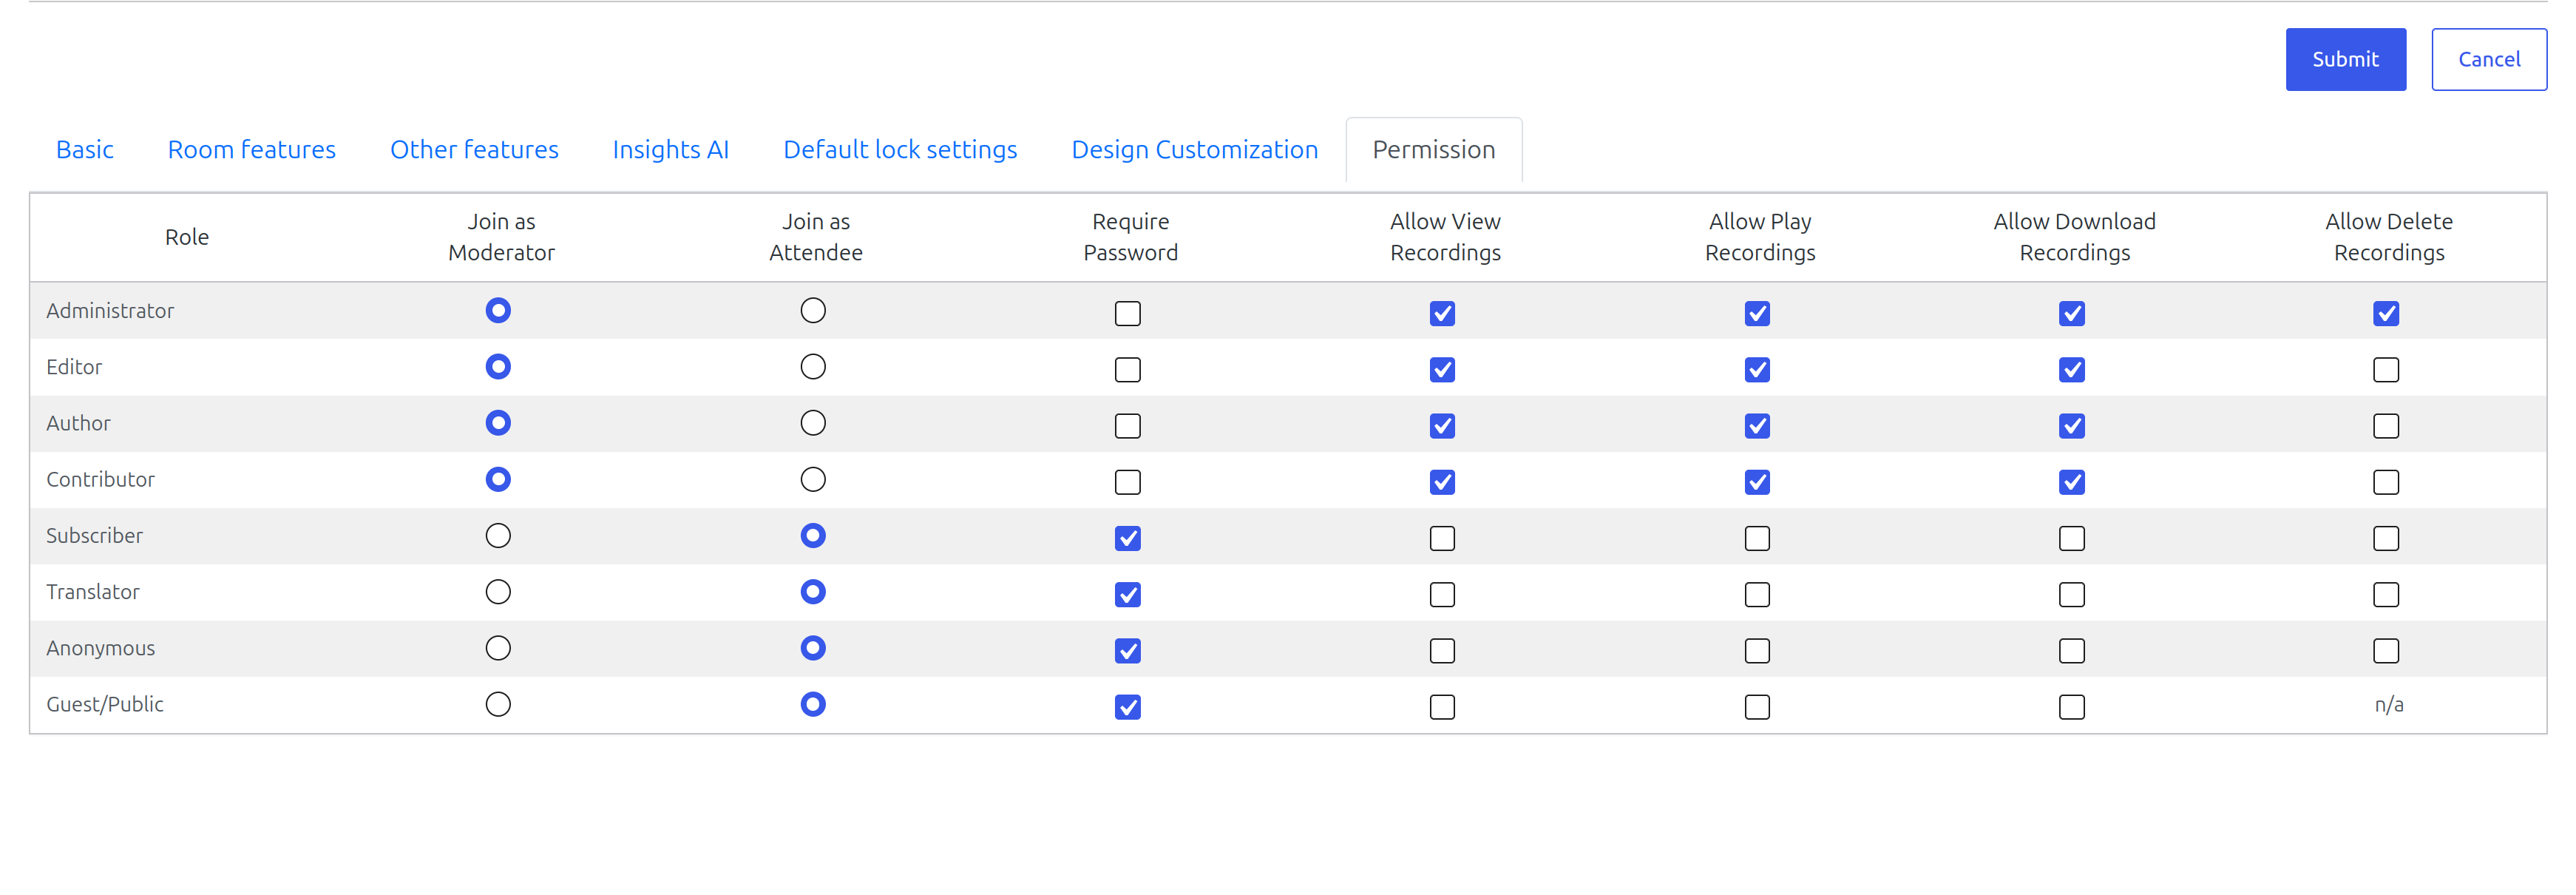
Smart Defaults: The plugin starts with sensible defaults. Roles with administrative capabilities (like edit_users or edit_posts, which typically apply to Administrators and Editors) are automatically set to join as moderators with full access to recordings. All other roles, including non-logged-in Guests, default to joining as attendees with more restricted permissions.
Customization: These defaults are just a starting point. You can override them for each role using the following options:
- Join as Moderator/Attendee: Determines the user's in-room privileges.
- Require Password: If checked, users with this role must enter the attendee password to join, even if they are logged in.
- Allow View/Play/Download/Delete Recordings: Provides granular control over how each role can interact with the room's recordings. The "Guest/Public" role cannot be granted permission to delete recordings.
Step 3.3: Publish the Room
You have two primary methods for making a room available to your users.
Option A: Embed in a Page with a Shortcode
This method is ideal for integrating a meeting room into an existing page or post alongside other content.
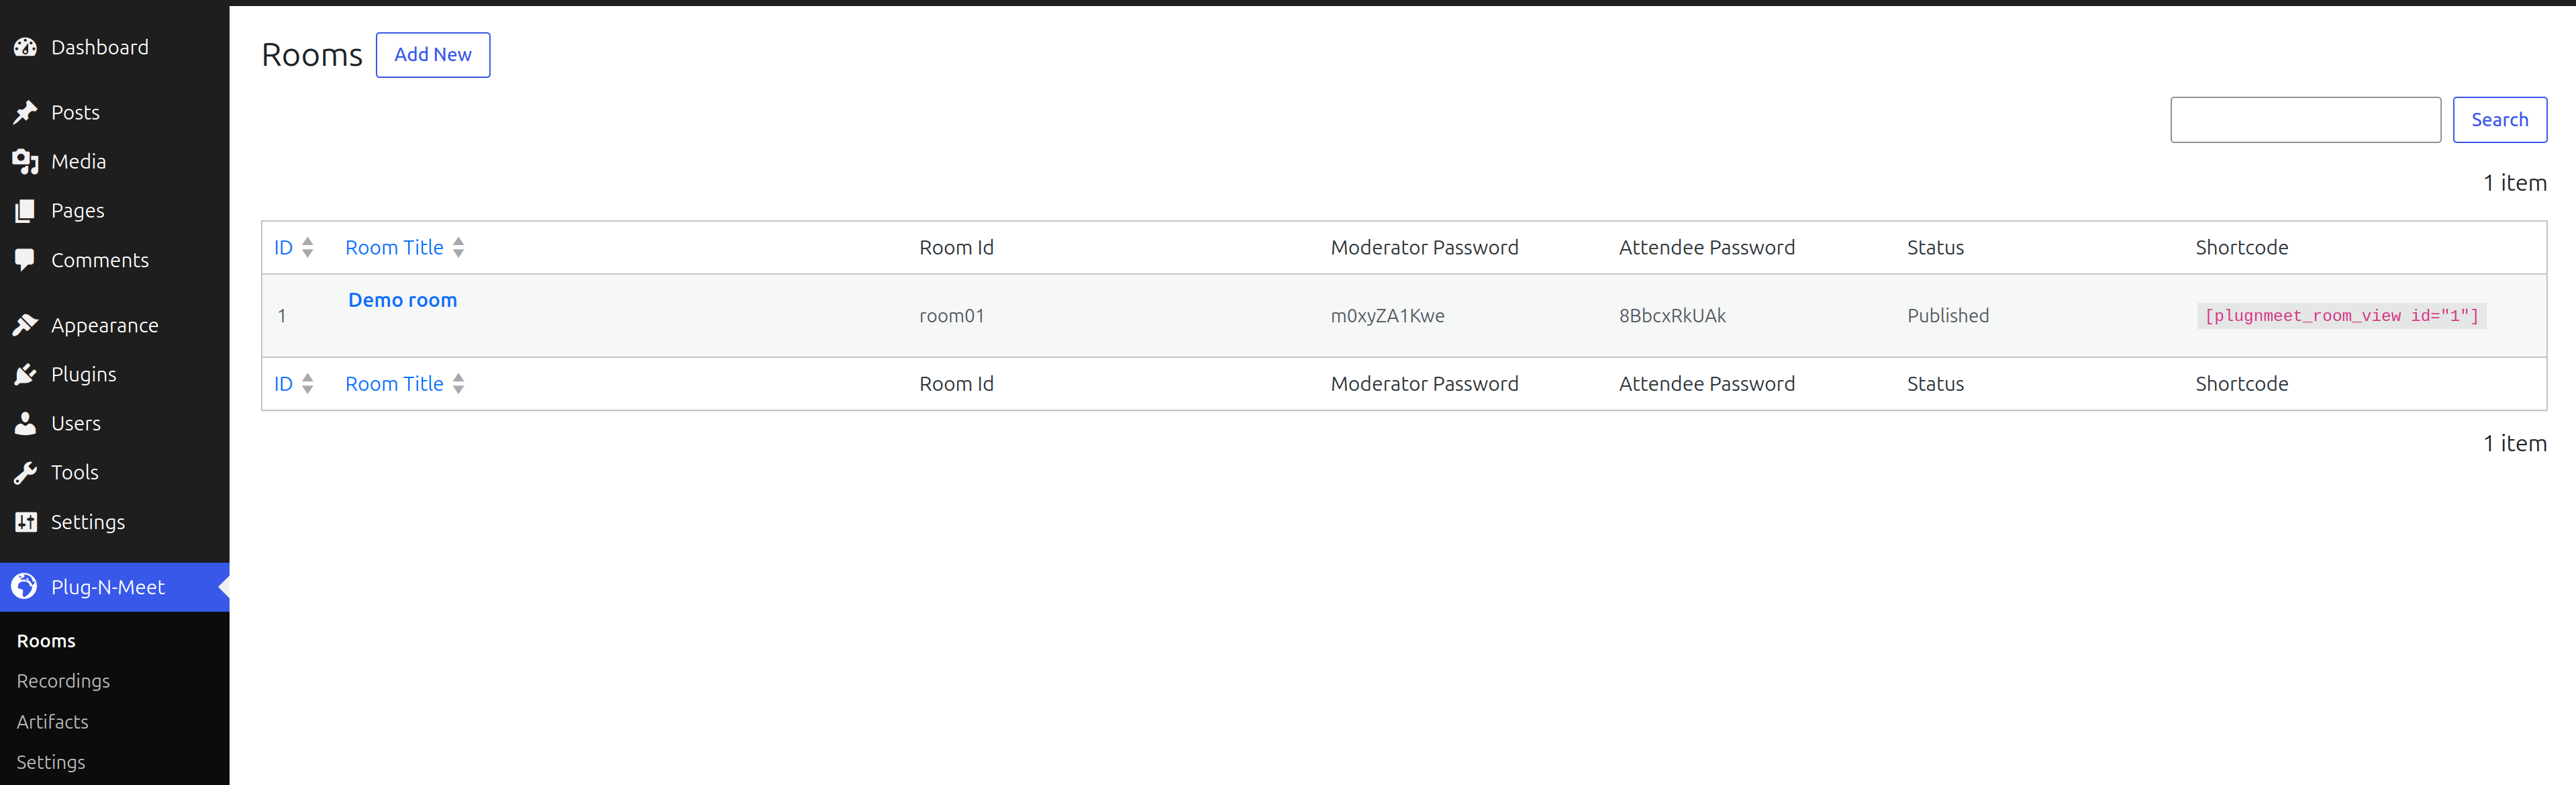
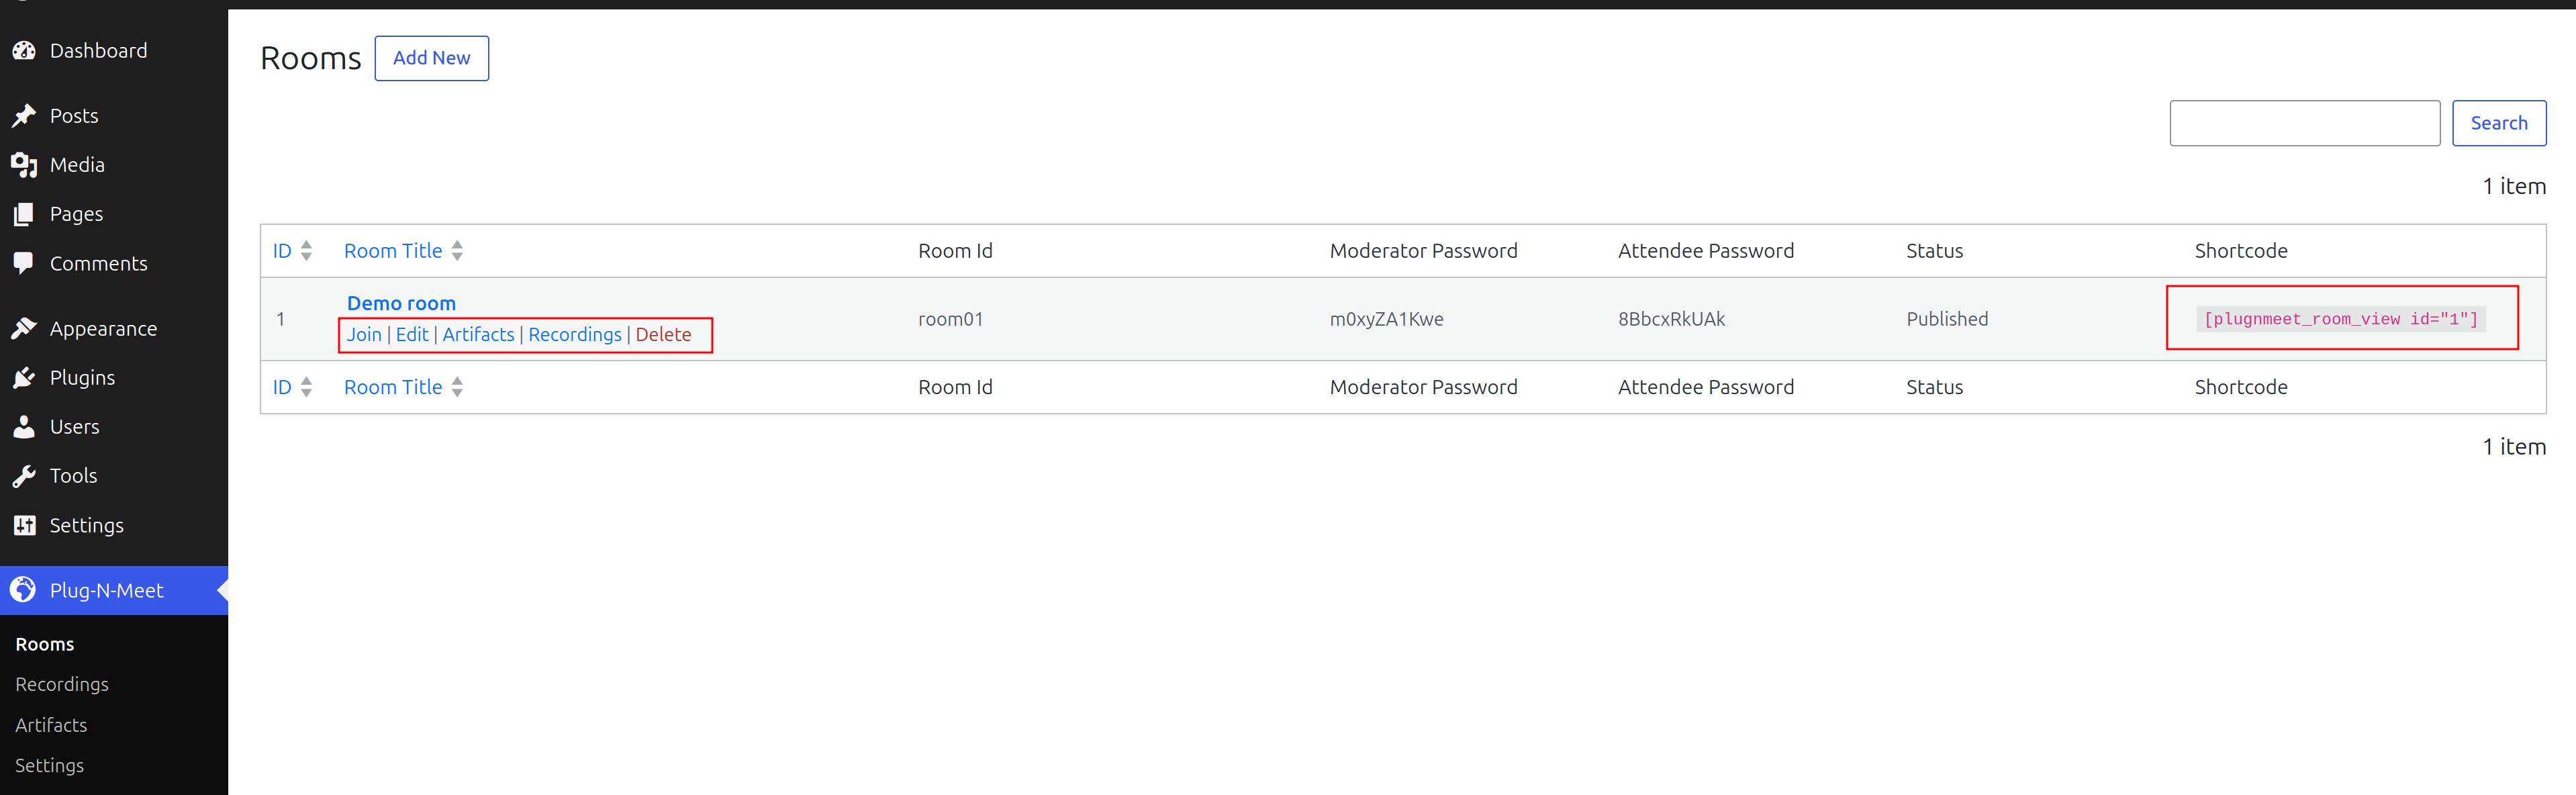
- Go to Plug-N-Meet > Rooms and find the room you just created.
- In the Shortcode column, copy the unique shortcode for that room.
- Paste the shortcode into the content area of any WordPress page or post.
- Publish the page. When a user visits, they will see a customizable form to join the meeting.
Option B: Use a Clean, Shareable Direct Link
Every room you create automatically has a direct, shareable link. This is perfect for sending in emails or for a clean, professional look. The URL structure consists of a base slug and the unique room ID: yoursite.com/[slug]/[room-id].
You have full control over this structure:
-
Customize the URL Slug (Optional):
- Go to Plug-N-Meet > Settings > Options.
- Find the Room Slug Path field. By default, it is
plugnmeet/room. - You can change this to something more unique, like
meetings. Your new URL structure will beyoursite.com/meetings/your-room-id/.
-
Ensure a Clean Layout with a Host Page:
- By default, visiting the direct link may show the meeting inside your theme's standard post layout (with sidebars, etc.). To ensure a clean, distraction-free view, you should assign a blank page as a template.
- Create a Blank Page: Go to Pages > Add New and create a new, empty page. Name it "Meeting Host" or something similar.
- Assign the Host Page: Go back to Plug-N-Meet > Settings > Options and select the page you just created from the Room Host Page dropdown.
-
Refresh Permalinks:
- After customizing the slug or setting the host page, you must refresh your permalinks.
- Go to Settings > Permalinks and simply click "Save Changes."
Now, all your direct room links will open in a clean, professional layout using your custom URL structure.
4. Post-Session Management
After a meeting concludes, all generated assets are neatly organized and accessible from the Plug-N-Meet > Rooms page in your WordPress admin area. From the rooms list, you can access the Recordings and Artifacts for each session.
Managing Recordings
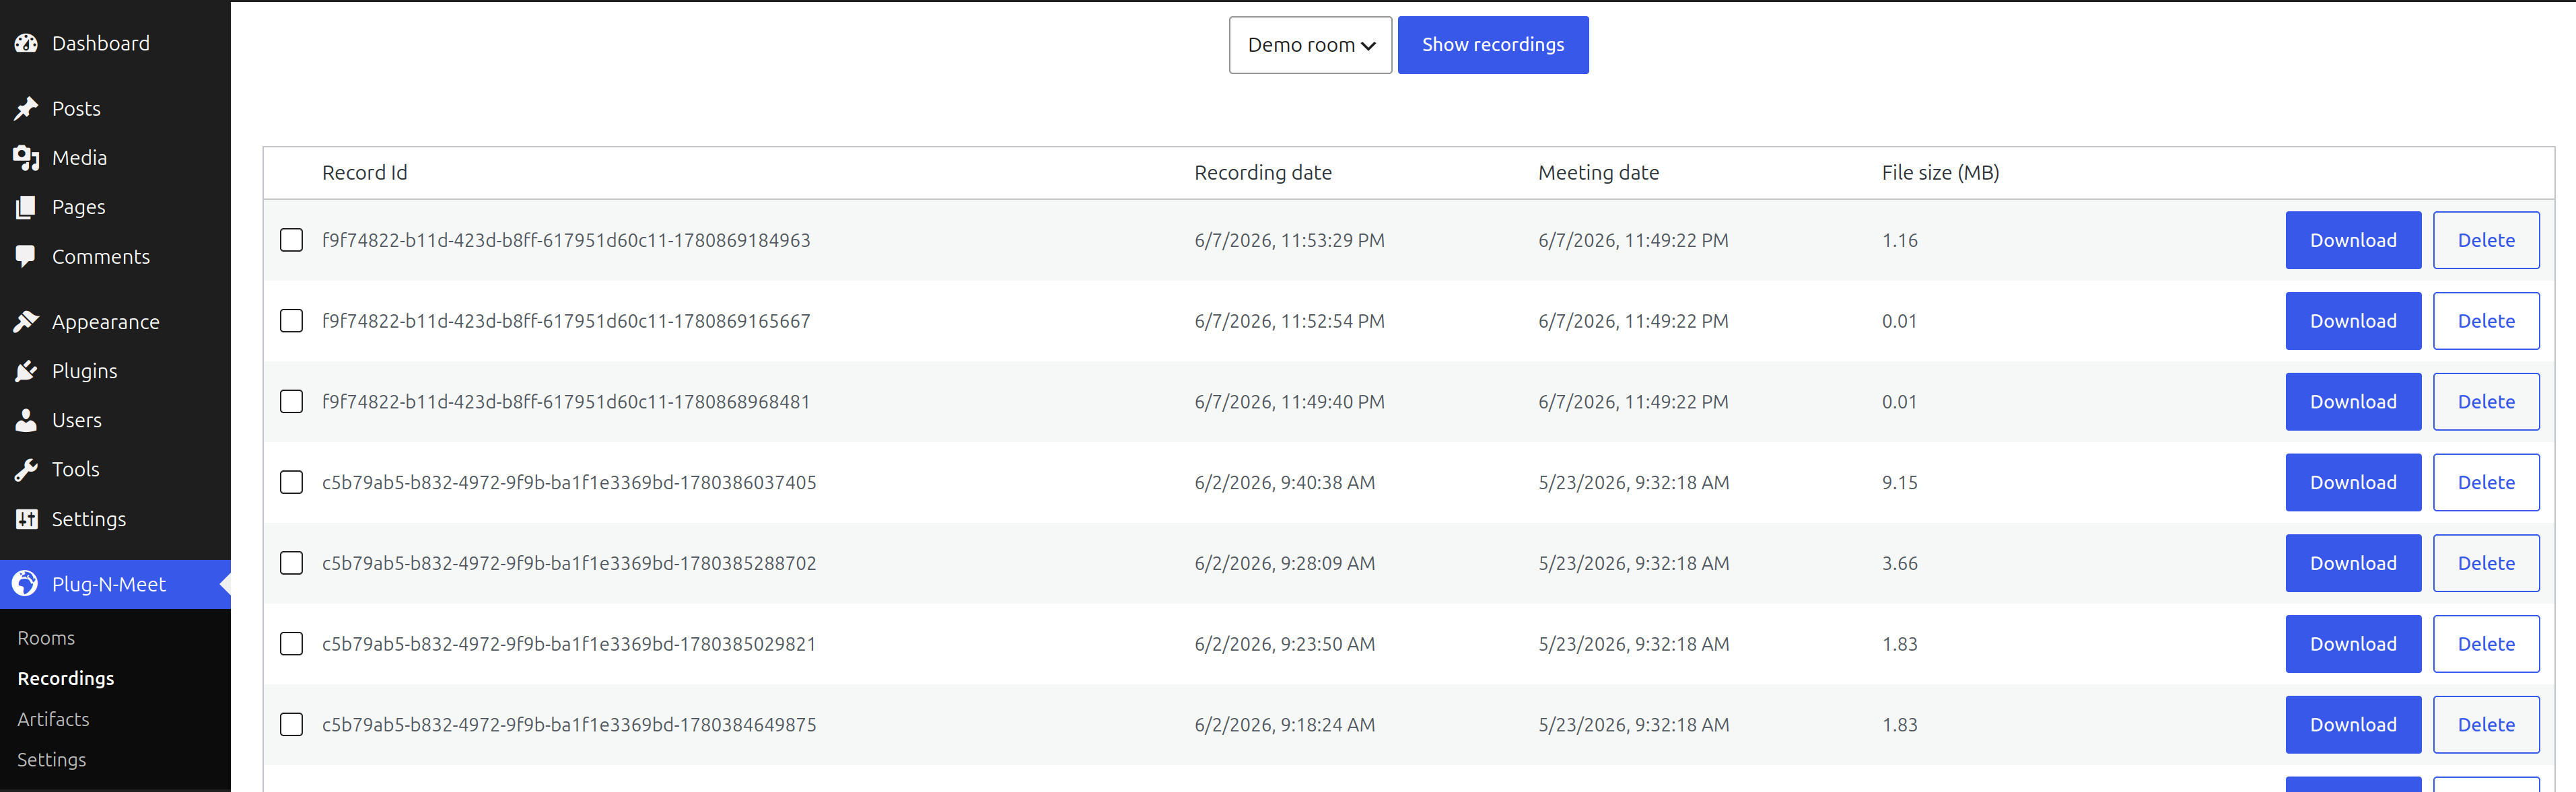
The Recordings page for each room allows you to:
- Download and delete recordings.
- Merge multiple recording segments into a single, continuous MP4 file for easy distribution.
Accessing Artifacts
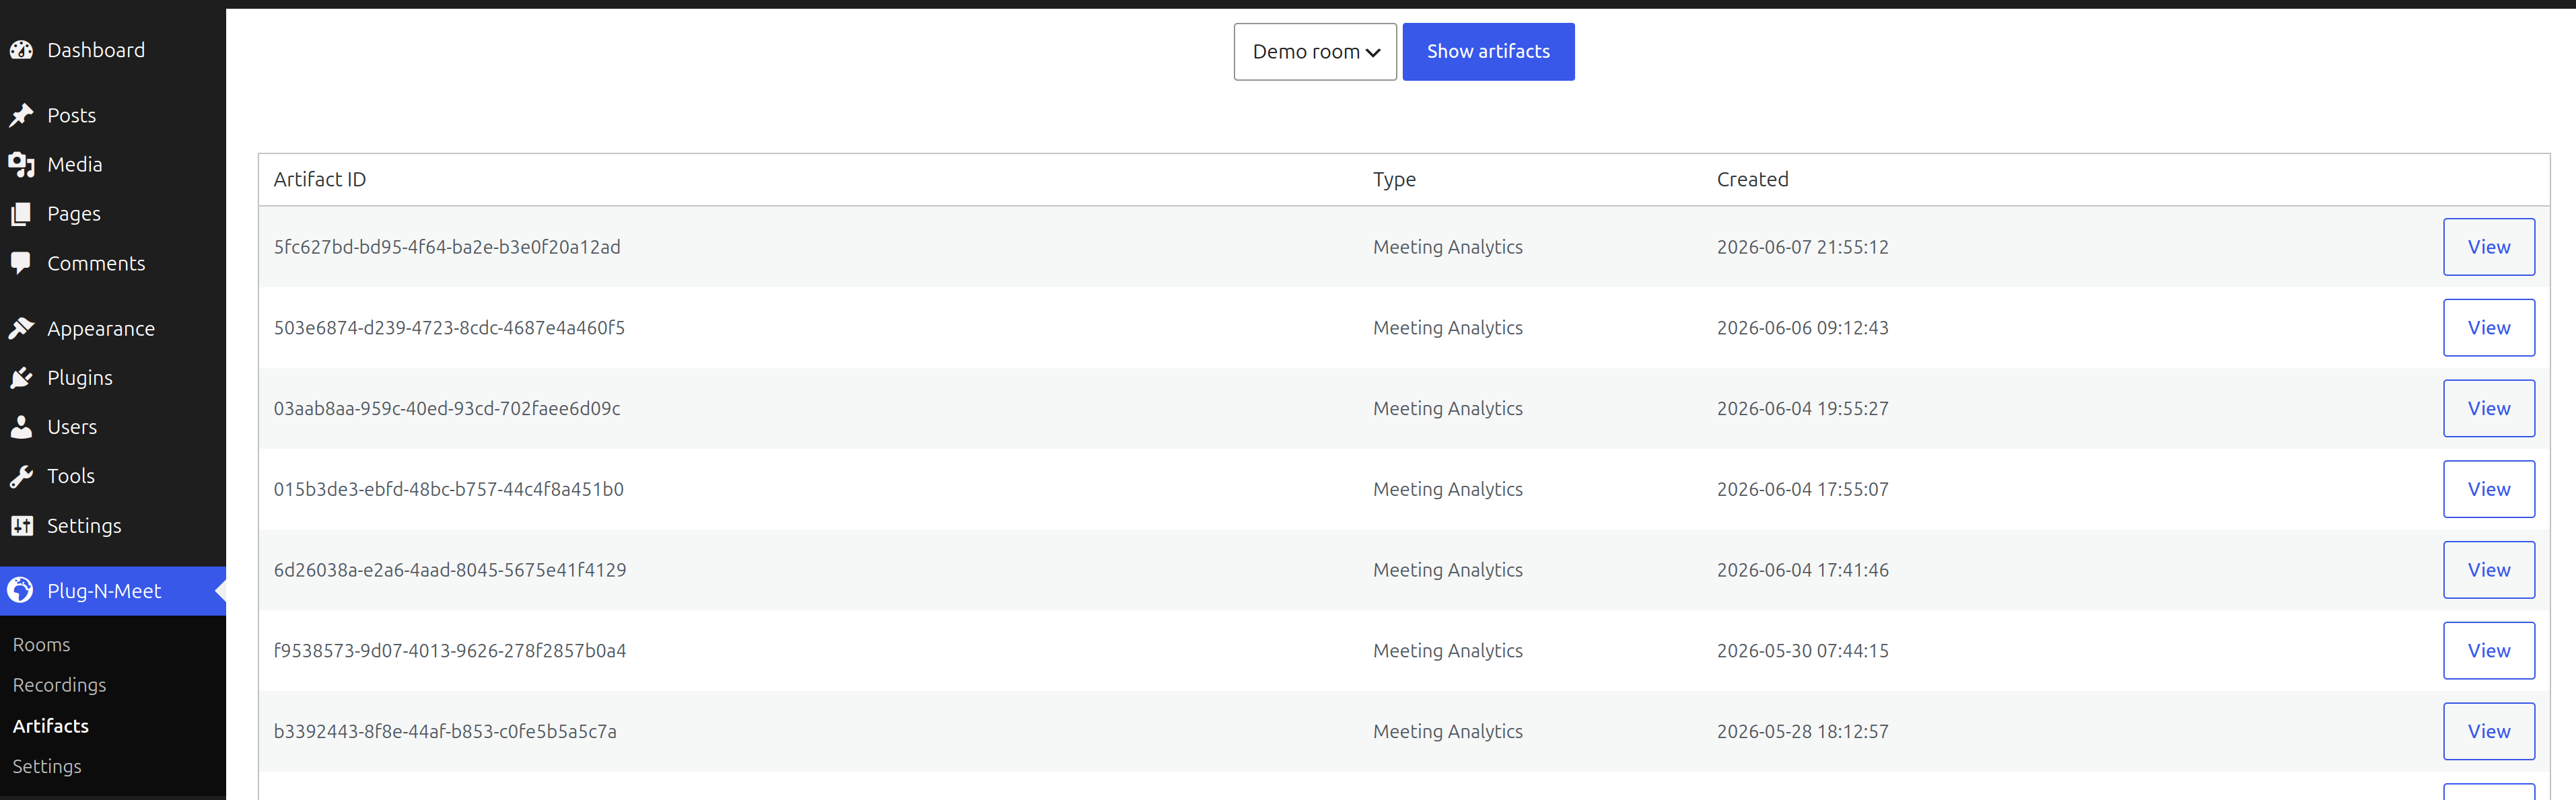
The Artifacts page contains all other files and data generated during the session. This includes:
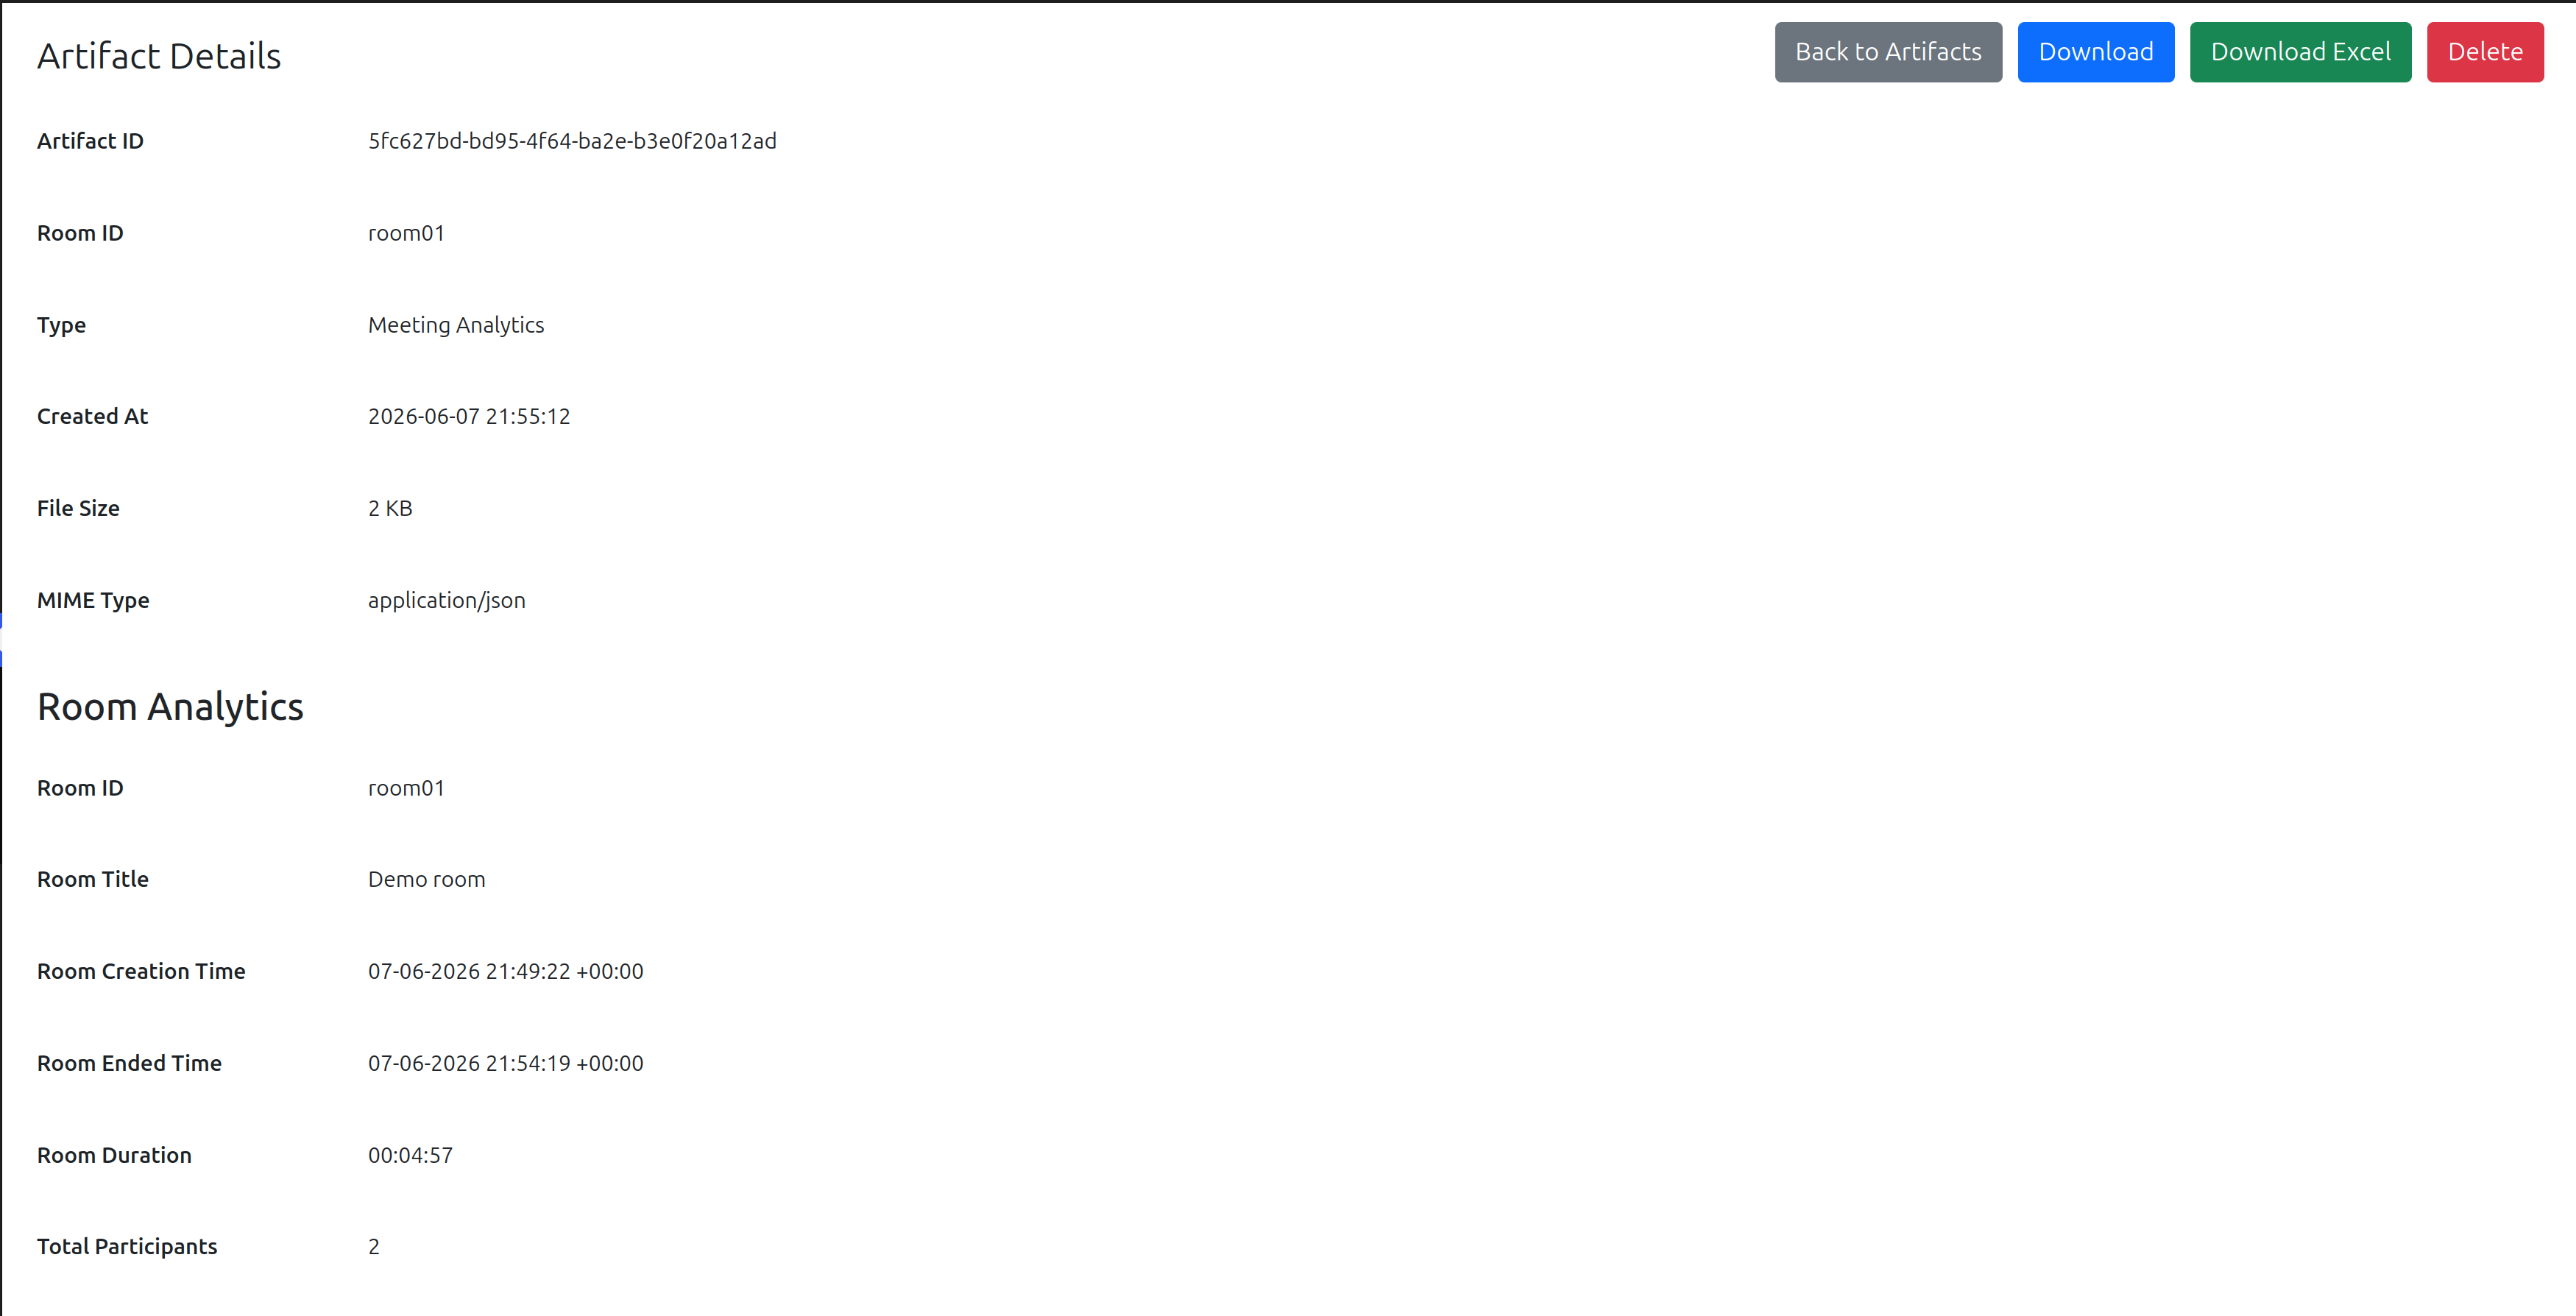
- Analytics Reports: Download comprehensive post-meeting analytics in Excel format, detailing participant engagement, talk time, connection quality, and more.
- AI-Generated Summaries: Access and download meeting summaries created by the AI.
- Transcription Files: Download speech-to-text transcripts of the meeting audio.
5. Advanced Configuration
Overriding Plugin Templates for Theme Developers
For maximum flexibility, the plugNmeet plugin allows theme developers to override any of its front-end template files by creating copies in their own theme directory. The plugin follows the standard WordPress template hierarchy, searching for files in this order:
[your-child-theme]/plugnmeet/[your-parent-theme]/plugnmeet/[plugin-directory]/public/partials/(the default)
How to Override:
- Locate the original file: Find the template you want to change inside the plugin's
/wp-content/plugins/plugnmeet/public/partials/directory. - Replicate the structure: In your theme's folder (preferably a child theme), create a
plugnmeetdirectory. If the original file is in a subfolder (e.g.,parts/), create that subfolder inside yourplugnmeetdirectory as well. - Copy and modify: Copy the original file to the new location in your theme and customize it to your needs.
Example 1: Minor Customization
To change the layout of the join form, you would copy:
[plugin-dir]/public/partials/parts/login-form.php
to
[your-theme]/plugnmeet/parts/login-form.php
and then edit the file in your theme.
Example 2: Major Structural Changes
To completely change the overall structure of the room view, you can override the main display file. Copy:
[plugin-dir]/public/partials/plugnmeet-public-display.php
to
[your-theme]/plugnmeet/plugnmeet-public-display.php
This allows you to add custom wrapper divs, change the order of template parts, or even conditionally load different parts based on your own logic.
Developer Hooks
The plugin fires a plugnmeet_webhook_data action hook, allowing you to process real-time event data from your meetings. You can hook into this in your theme's functions.php or a custom plugin.
add_action( 'plugnmeet_webhook_data', 'my_plugnmeet_webhook_handler', 10, 1 );

function my_plugnmeet_webhook_handler( $data ) {
  // Process the webhook data here
  // e.g., log to a file, send to a CRM, etc.
}
6. Security and Privacy
Security is a core strength of the plugNmeet platform.
- Data Control: Because you control the server (either self-hosted or through our private cloud), you control your data.
- On-Premises Hosting: For maximum privacy, the open-source plugNmeet server can be installed on your own on-premises hardware, ensuring sensitive data never leaves your network. This is ideal for organizations with strict data compliance needs (e.g., GDPR, HIPAA).
- Encryption: All communication is encrypted by default using WebRTC standards. For maximum security, you can enable End-to-End Encryption (E2EE) for your meetings.