Attendee Guide: How to Join and Participate in a Meeting
Welcome to the Attendee Guide! This document will walk you through everything you need to know to successfully join and participate in a Plug-N-Meet video conference.
First Steps: Joining a Meeting
When you first enter a PlugNmeet room, you will be prompted to choose how you want to join the audio session. This is your most important first step.
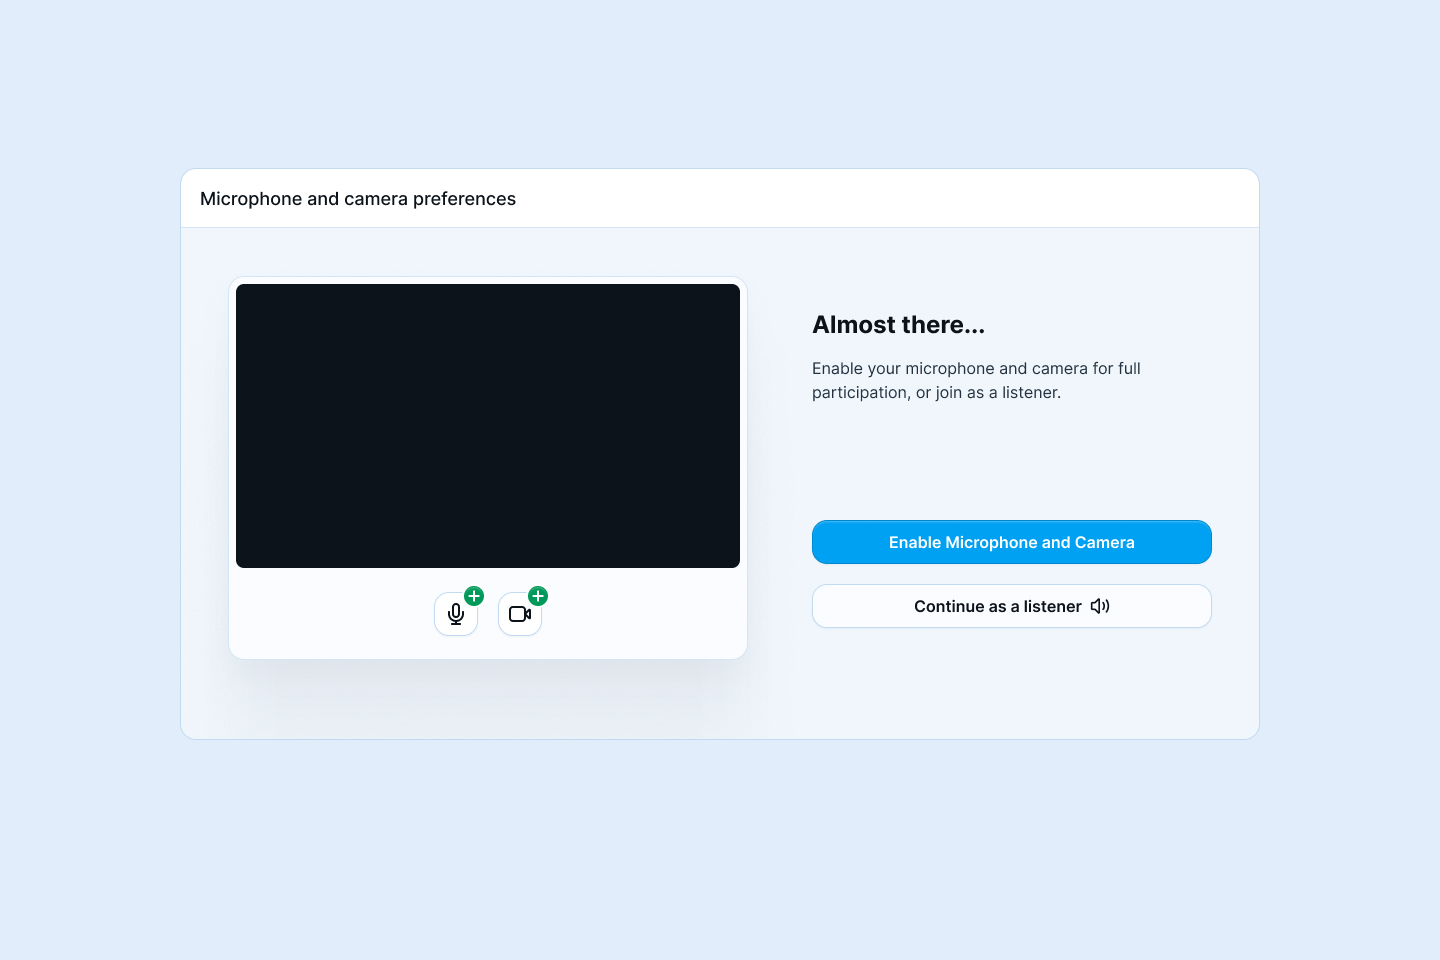
- Enable Microphone and Camera: Choose this option to speak and share your video in the meeting. Your browser will ask for permission to access your microphone and camera.
- Continue as a listener: Choose this option to join without a microphone or camera. You will be able to hear everything but will not be able to speak or share video.
Important: This choice is not permanent. If you decide to Continue as a listener, you can easily activate your microphone and camera later from the main control bar (if the moderator allows it).
Section 1: The Attendee Control Bar
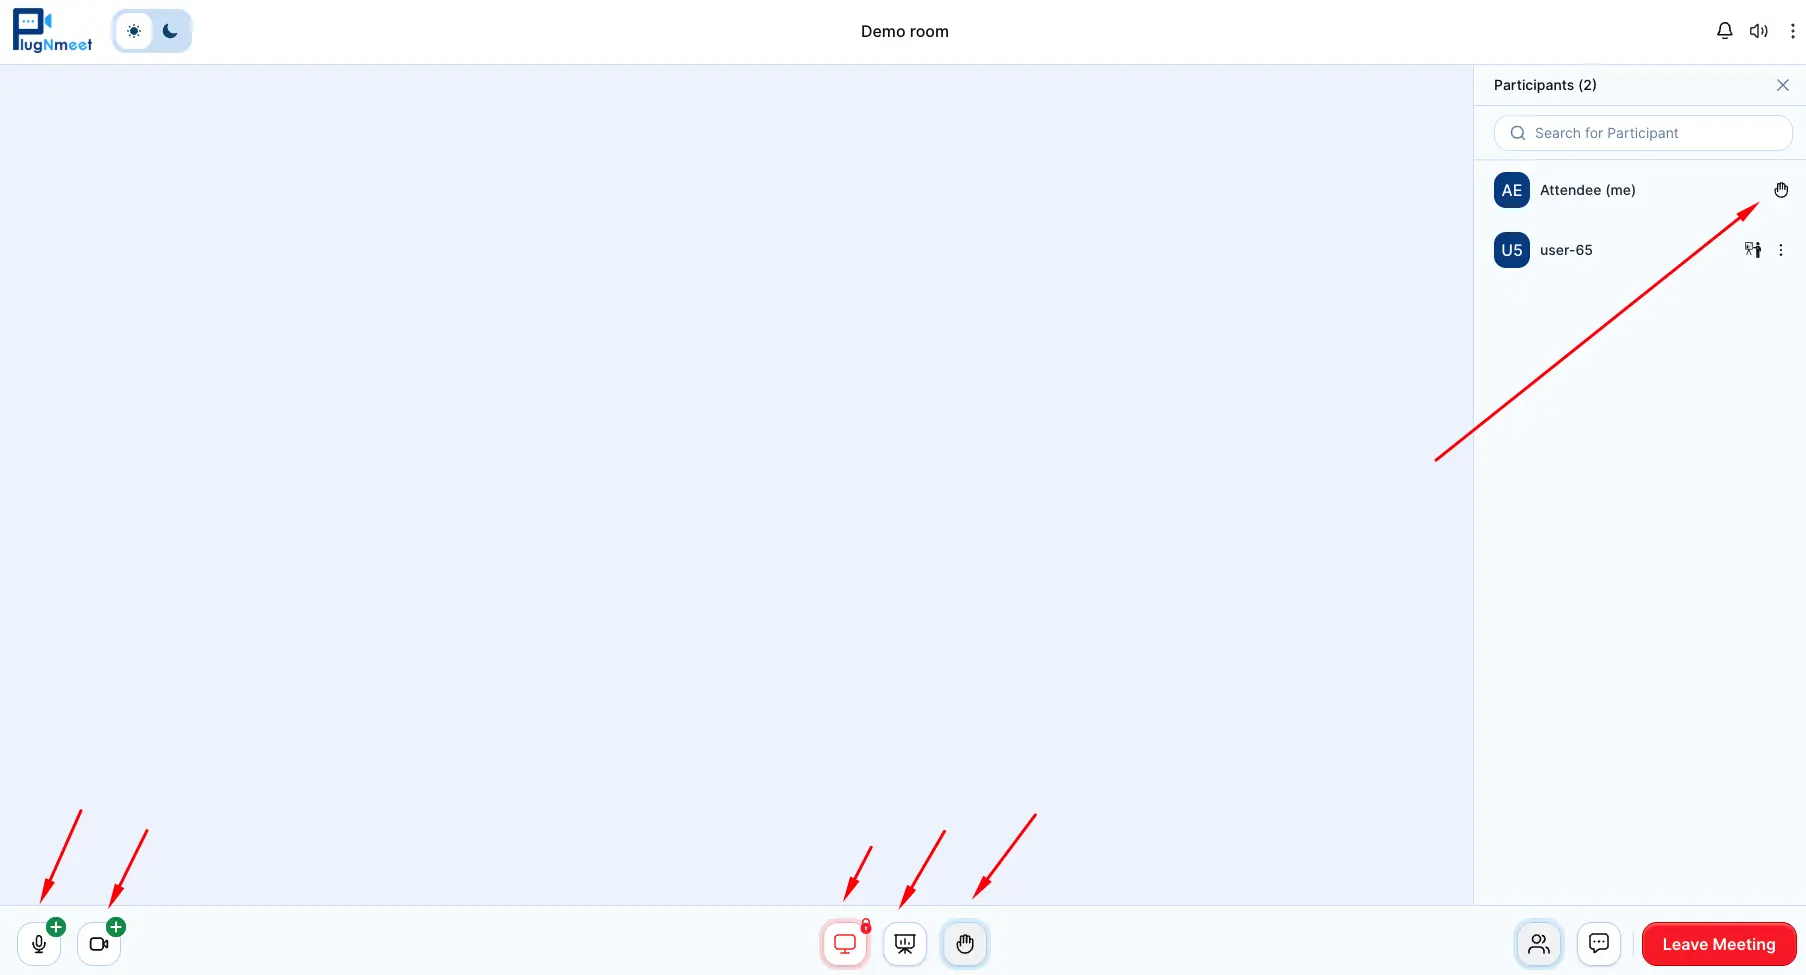
These are the basic controls you will use during the meeting, located at the bottom of the screen.
- Microphone: Click this icon to mute or unmute yourself.
- Webcam: Click this icon to start or stop sharing your webcam. You can choose a virtual background before you share.
- Raise Hand: Click this icon to signal to the moderator that you have a question or wish to speak.
Section 2: Participating in the Meeting
These features allow you to interact with the moderator and other participants.
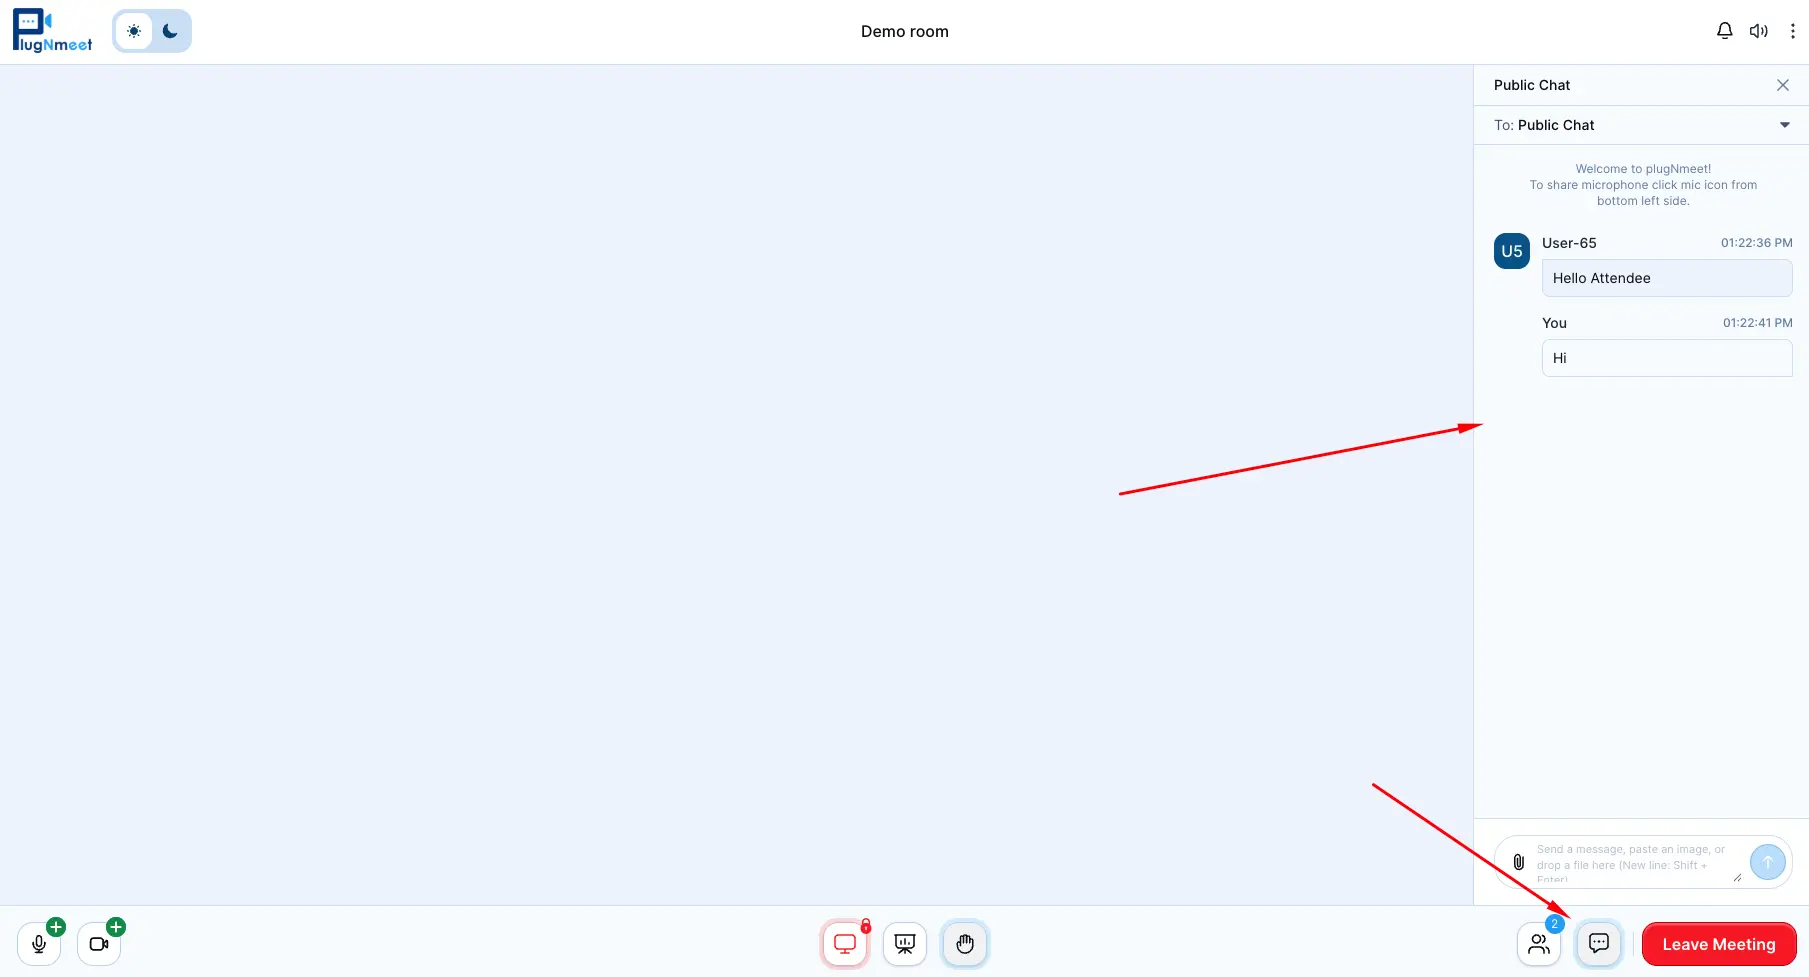
Using the Chat
- Public Chat: Click the Chat icon to open the main chat panel where you can send messages to everyone.
- Private Chat: To send a private message, open the Participants list, click the three-dot menu next to a user's name, and select Send private message.
Viewing the Participant List
- Click the Participants icon to see a list of everyone currently in the meeting.
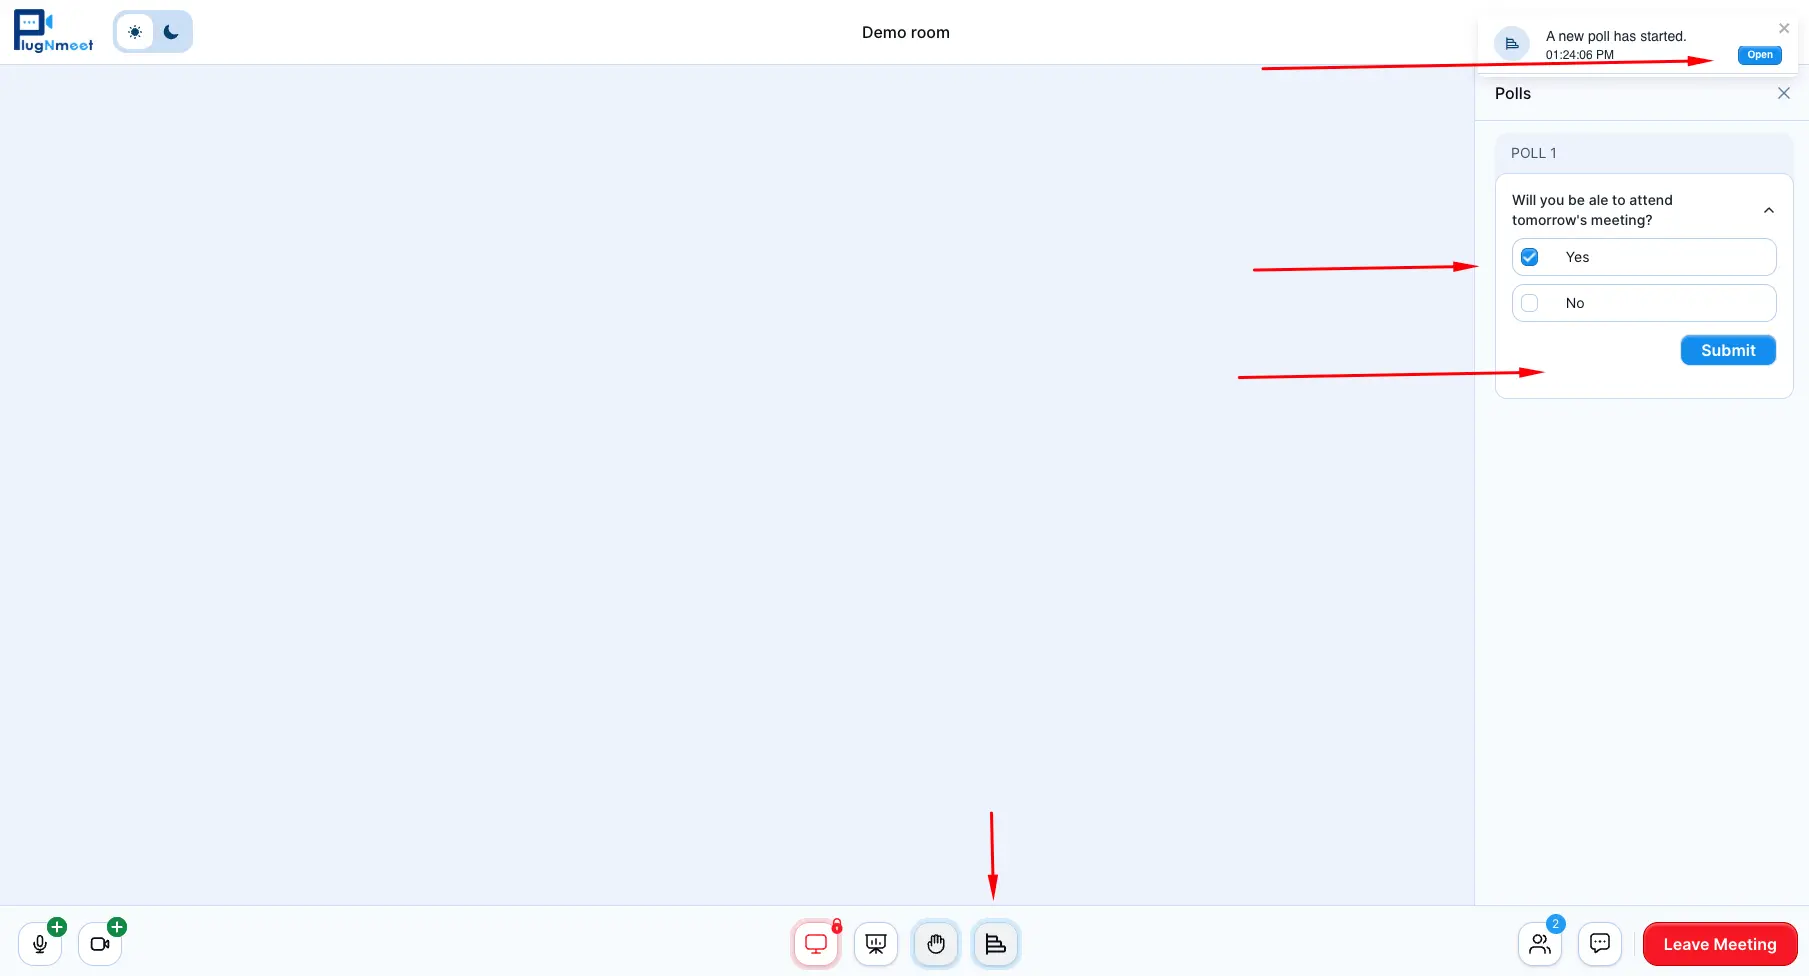
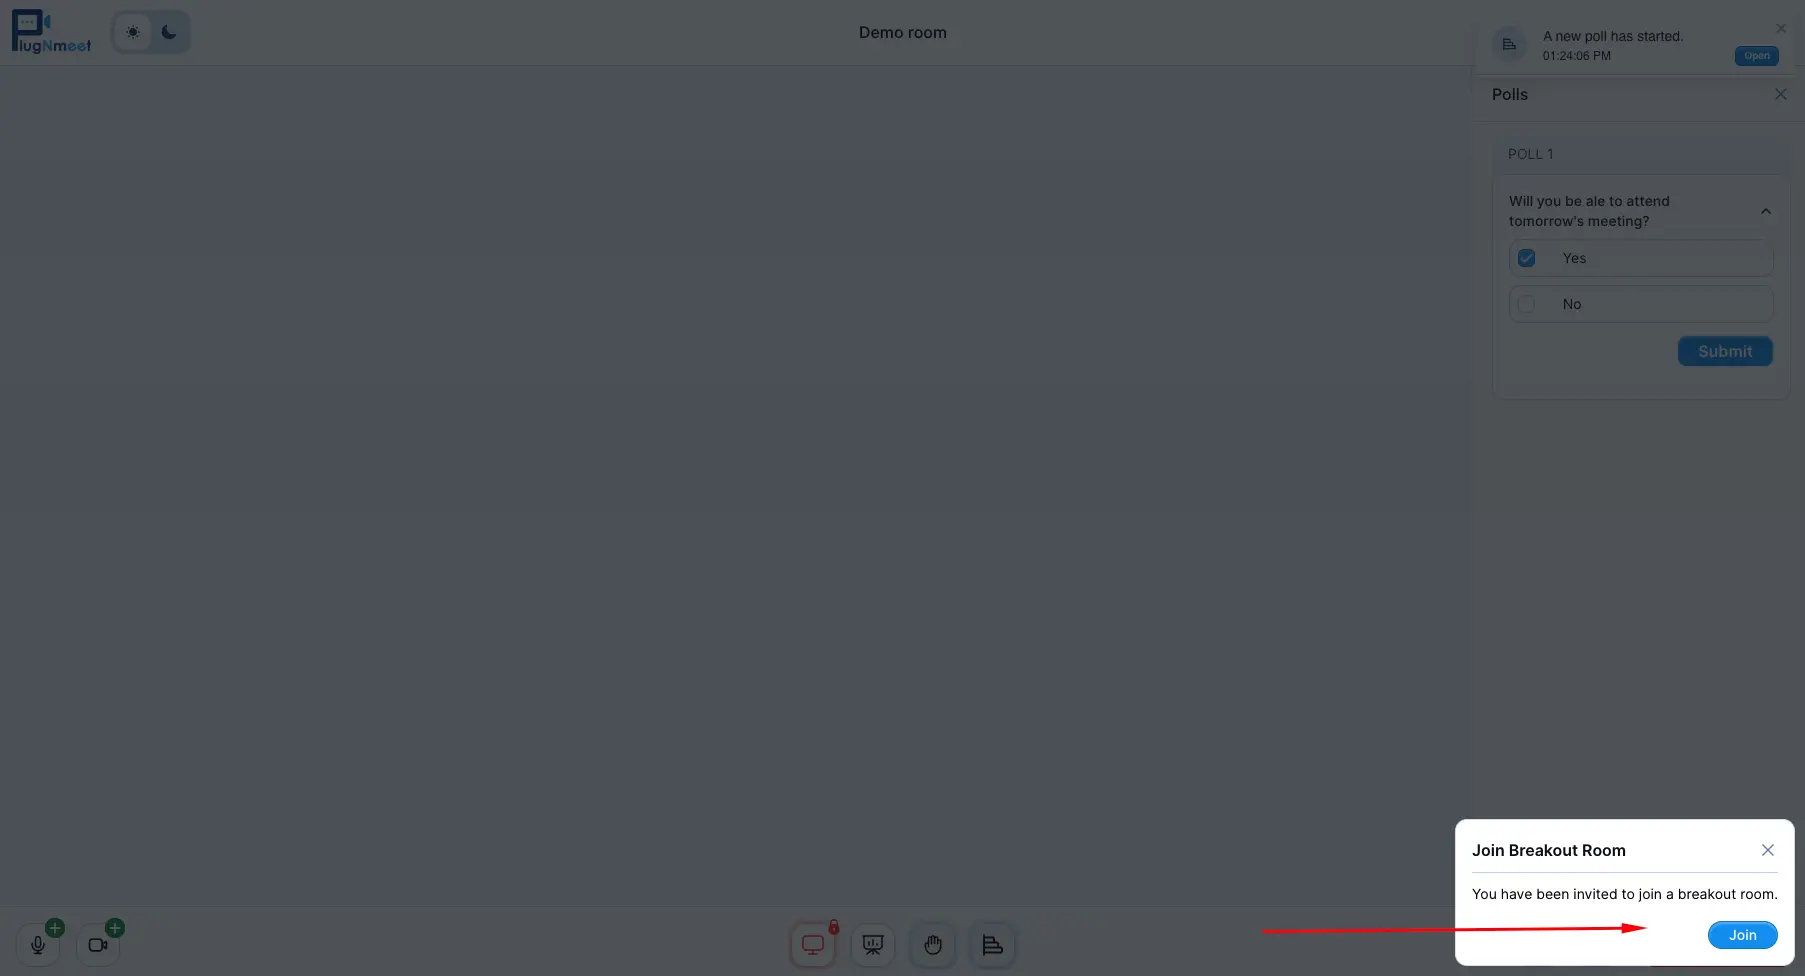
Responding to Polls
- If the moderator starts a poll, you will see a notification. You can open the Polls tab in the participant panel to cast your vote.
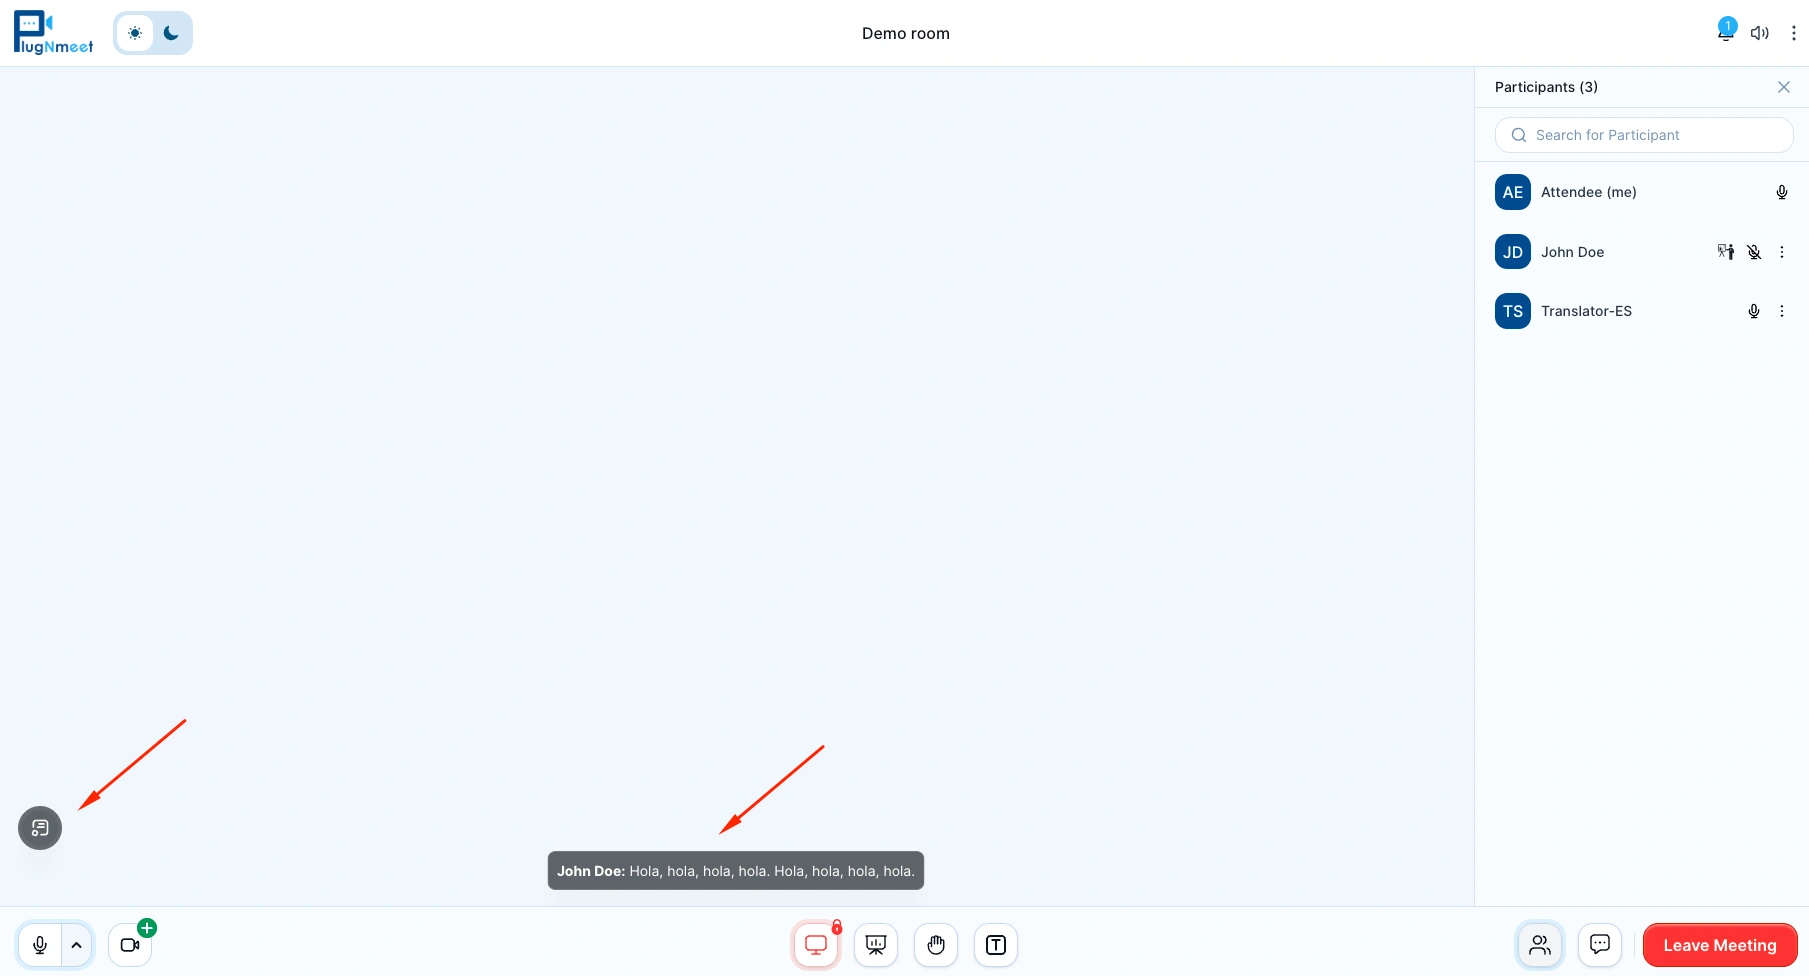
Transcription & Translation
- Start Transcription & Translation: Click the Transcription & Translation icon in the main footer control bar to start the service (if the moderator has enabled it for you).
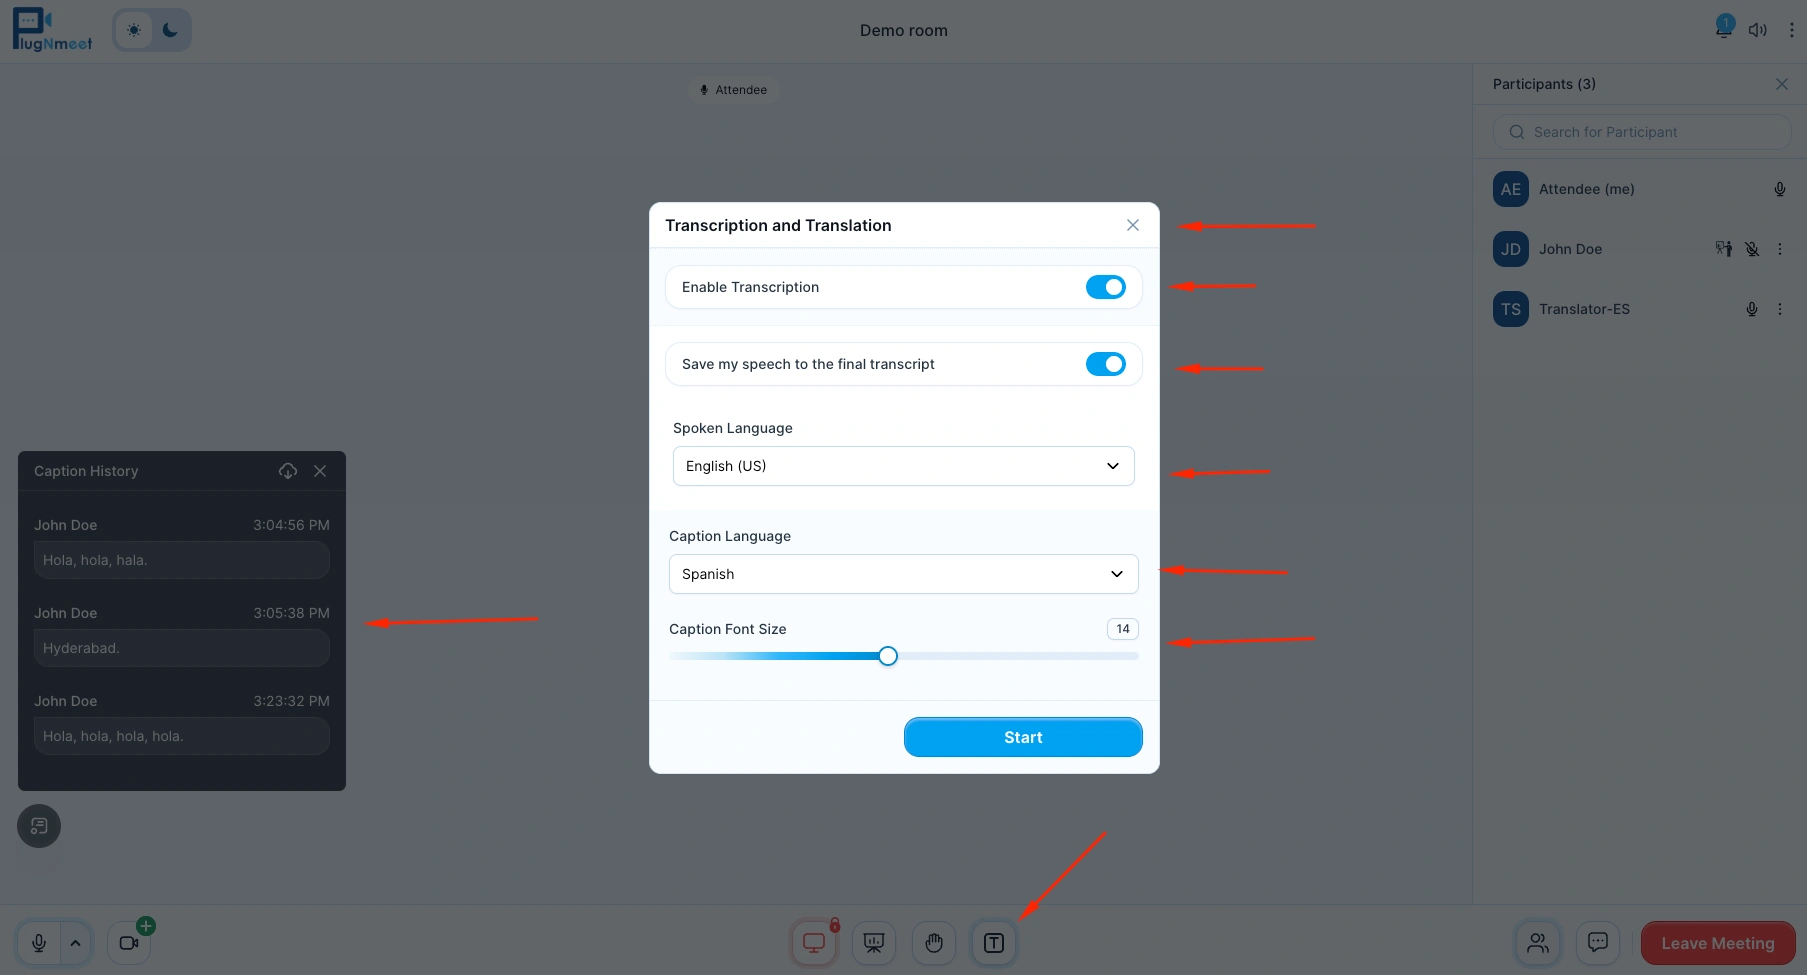
- History: You can view Live Transcription & Translation in real-time. Click the History icon to see the full transcript history.
Important: You must Enable Microphone to use Transcription & Translation.
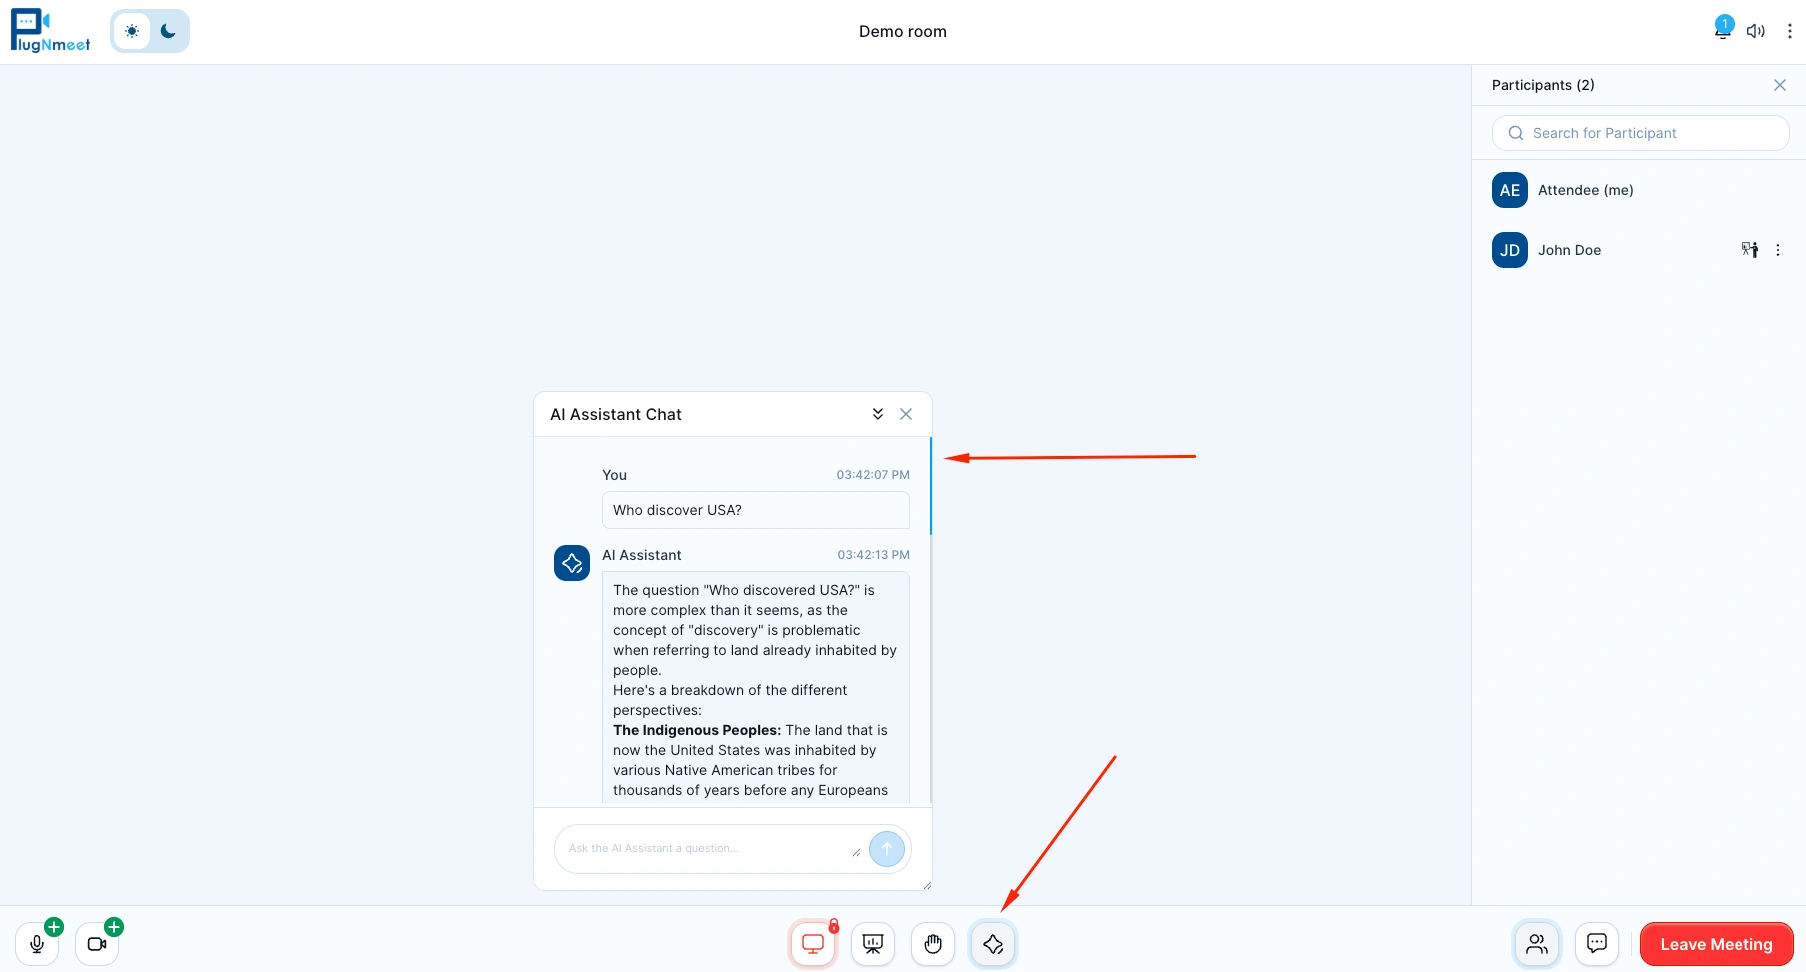
Using AI Assistant
- Enable/Disable: Click the AI Assistant icon in the main footer control bar to start the AI Assistant (if the moderator has enabled it for you).
Section 3: Viewing Content
The moderator can share various types of content during the meeting.
- Viewing a Shared Screen: If the moderator shares their screen, it will automatically appear in the main area of the interface.
- Interacting with the Whiteboard: If the moderator activates the whiteboard, you will be able to see what they are drawing. They may also give you permission to draw on the whiteboard yourself.
- Viewing a Shared Video: If the moderator shares a video, it will appear on your screen with playback controls.
Section 4: Breakout Rooms
The moderator can split the main session into smaller Breakout Rooms for group activities.
- If you are assigned to a room, you will see a notification inviting you to Join.
- You will be taken to a new, smaller meeting room. When the breakout session is over, you will be returned to the main room automatically.
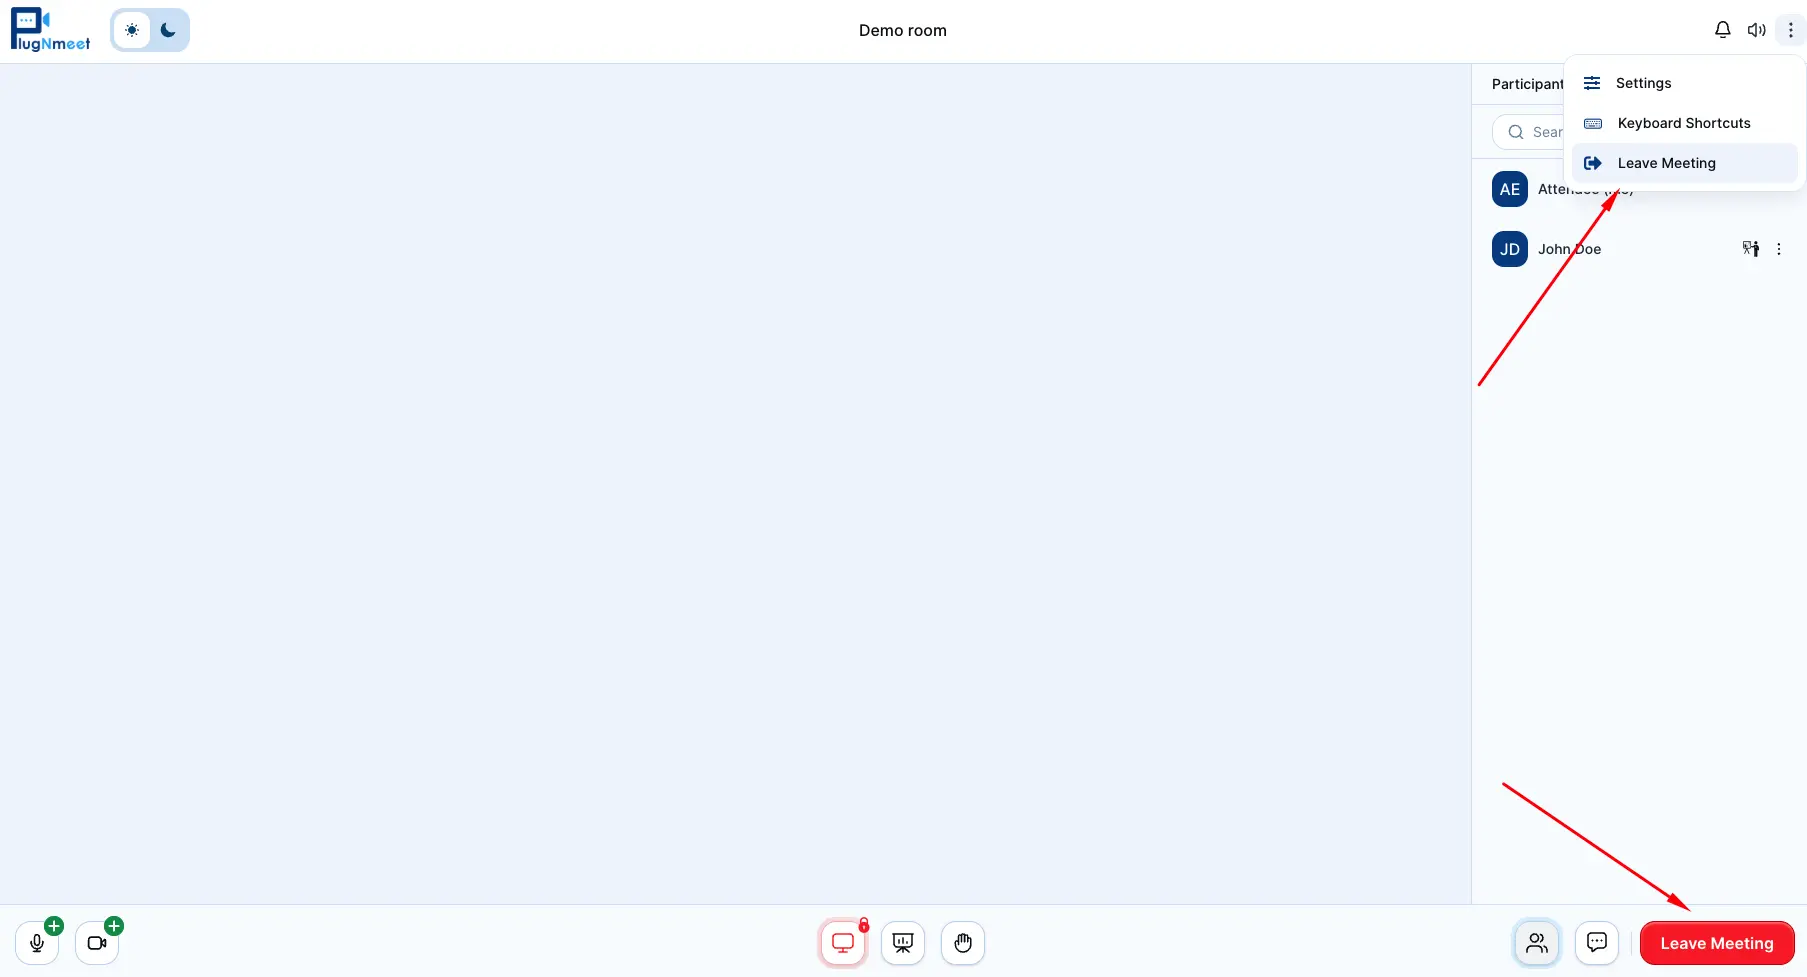
Section 5: Leave Meeting
- Leave Meeting: If you select Leave Meeting from the top-right menu or the bottom-right button, you will leave the meeting, but the session will remain active for other participants.